Overview
| The Bulk Actions feature allows account administrators to perform the four actions shown at the right on multiple user accounts with a couple clicks. | 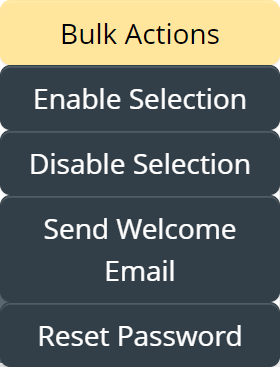 |
 In this article
- Selecting multiple accounts
- Enable the Selected User Accounts
- Disable the Selected User Accounts
- Send Welcome emails to the Selected User Accounts
- Reset Passwords for the Selected User Accounts
Selecting multiple accounts
In order to use bulk actions in Trella Admin, you will need to select multiple user accounts on the User page. The GIF below shows the possible ways to select or deselect multiple users.
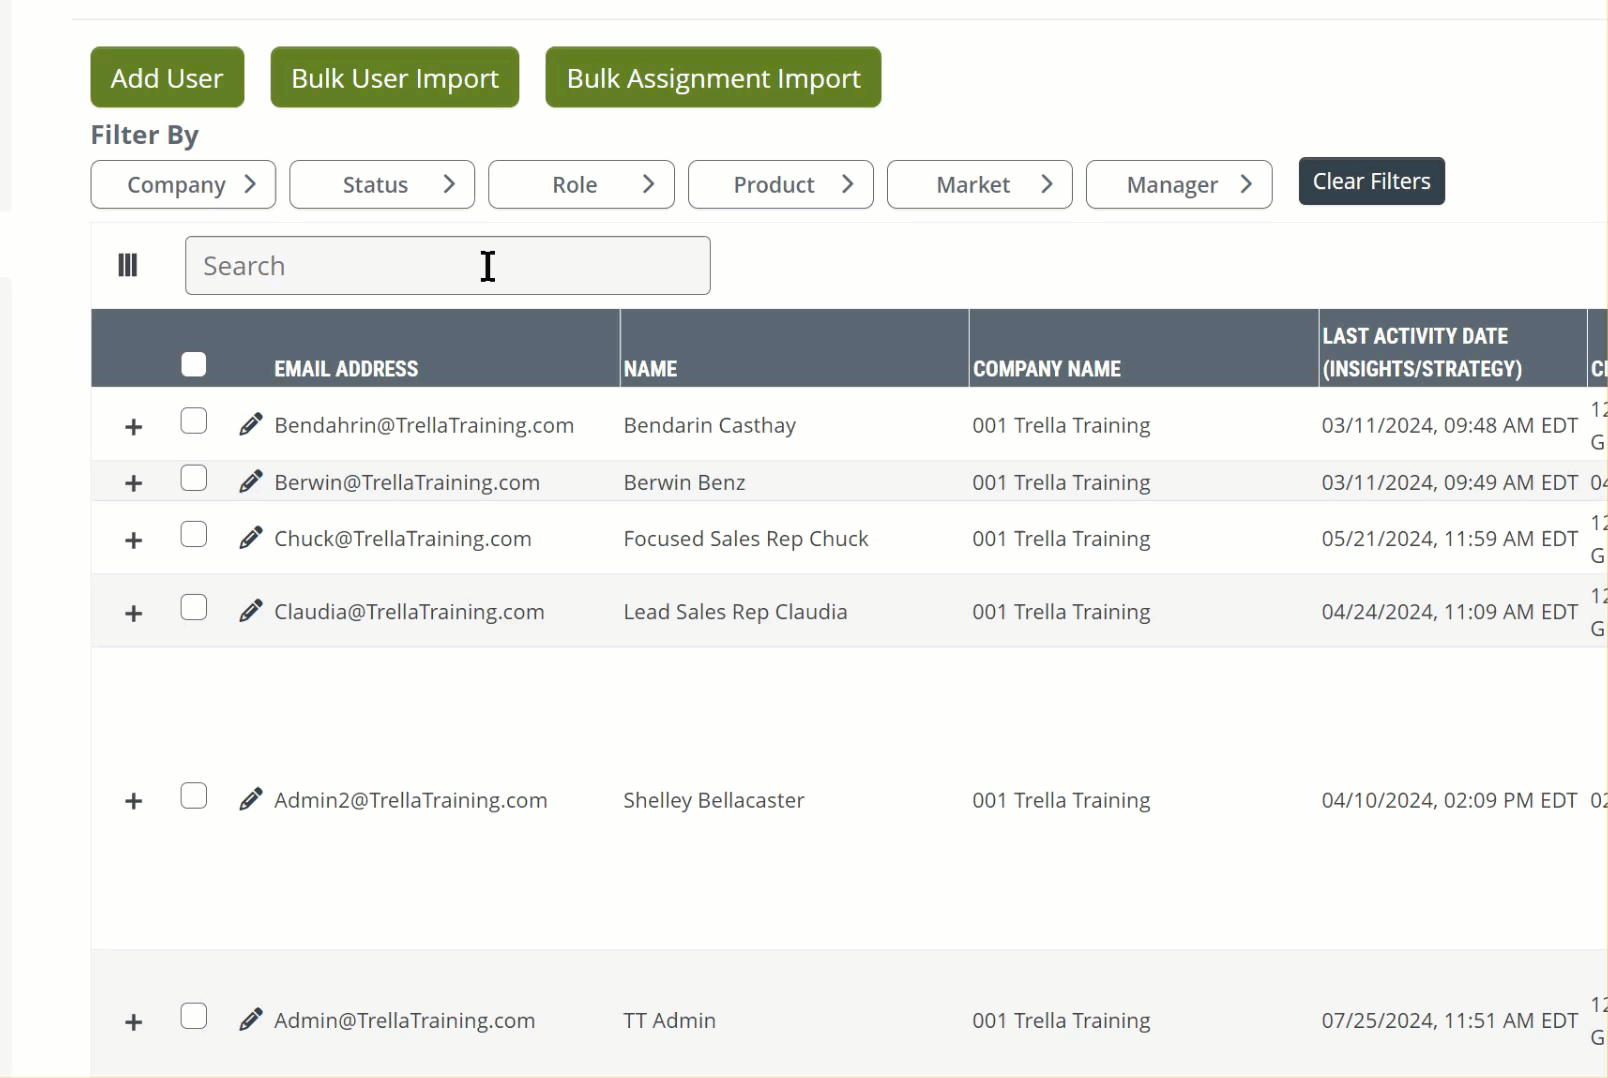
- Click on any number of empty checkboxes to either add the check, or to remove the check. Clicking on the boxes to the left of the user's email address will select or deselect a single user account at a time.
- Click on the top checkbox in the header to select all or deselect all. This checkbox is a toggle so you can click it on or off to add or remove check boxes.
- When you are finished making your selections, the user accounts with a check in the checkbox will have the bulk action applied in the steps below
Enable the Selected User Accounts
To enable multiple accounts, follow the steps below the image:
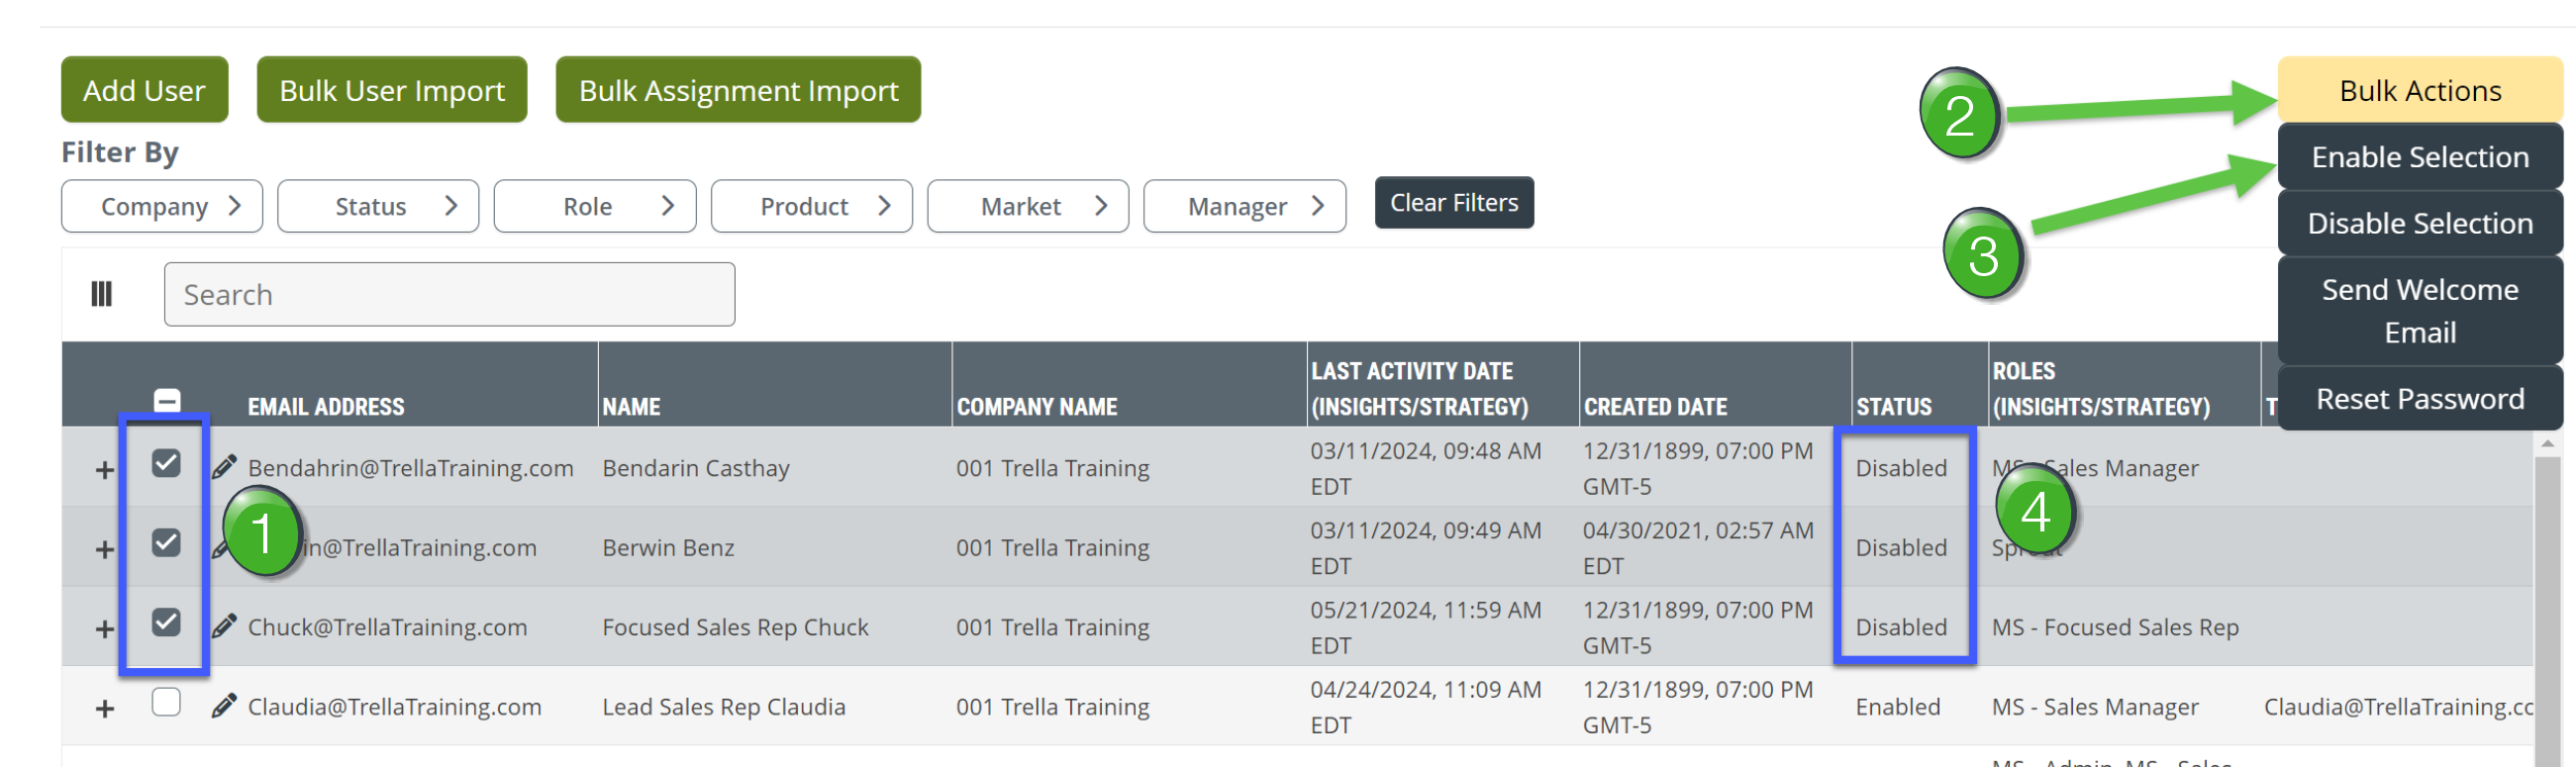
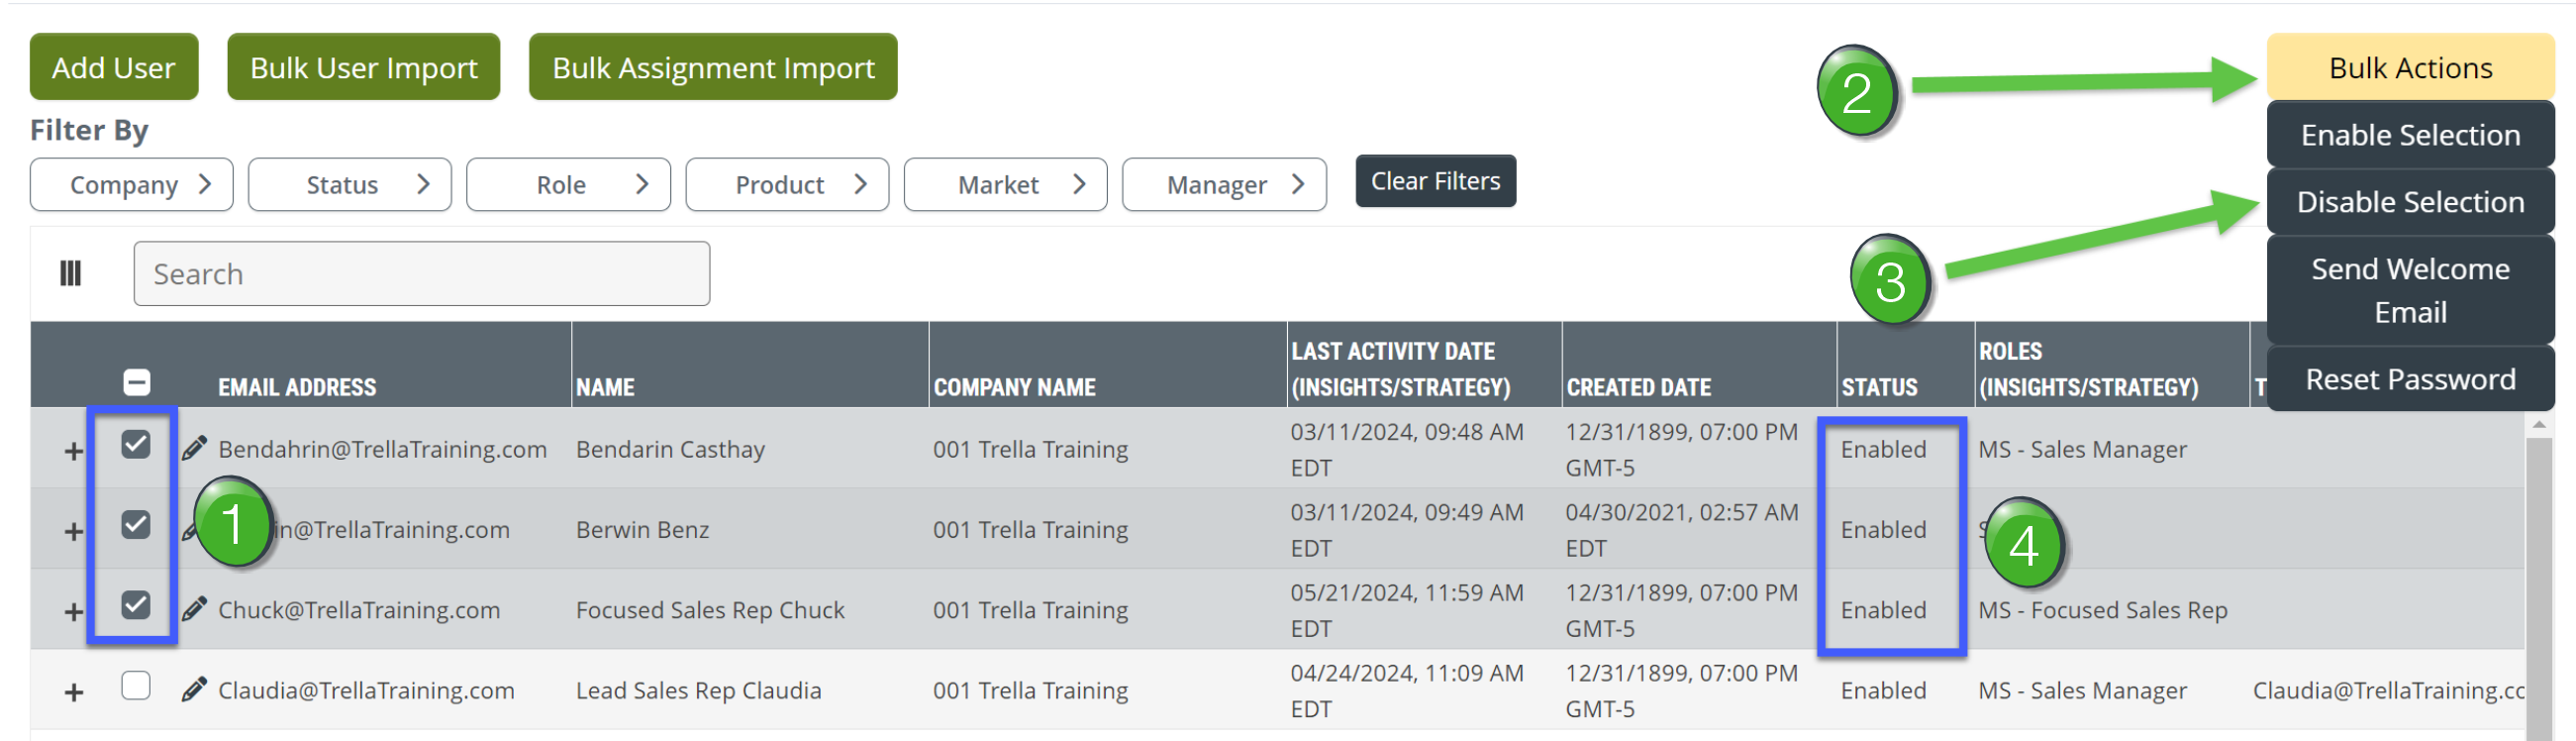
![]() Select the desired user accounts by clicking on the checkboxes to the left of their email addresses.
Select the desired user accounts by clicking on the checkboxes to the left of their email addresses.
![]() Click on the "Bulk Actions" button to open the options available.
Click on the "Bulk Actions" button to open the options available.
![]() Click on the "Enable Selection" button.
Click on the "Enable Selection" button.
![]() The accounts that are currently disabled will be enabled.
The accounts that are currently disabled will be enabled.
![]() If you accidentally select an account that is already enabled, no change will be made to that account.
If you accidentally select an account that is already enabled, no change will be made to that account.
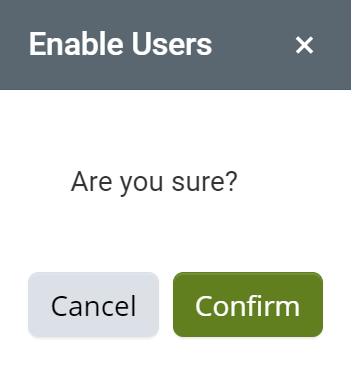
![]() When you click on the "Enable Selection" button, the following prompt will show up. Click on the "Confirm" button.
When you click on the "Enable Selection" button, the following prompt will show up. Click on the "Confirm" button.
![]() The selected accounts will be enabled.
The selected accounts will be enabled.
Disable the Selected User Accounts
To disable multiple accounts, follow the steps below the image:
![]() Select the desired user accounts by clicking on the checkboxes to the left of their email addresses.
Select the desired user accounts by clicking on the checkboxes to the left of their email addresses.
![]() Click on the "Bulk Actions" button to open the options available.
Click on the "Bulk Actions" button to open the options available.
![]() Click on the "Disable Selection" button.
Click on the "Disable Selection" button.
![]() The accounts that are currently enabled will be disabled.
The accounts that are currently enabled will be disabled.
![]() If you accidentally select an account that is already disabled, no change will be made to that account.
If you accidentally select an account that is already disabled, no change will be made to that account.
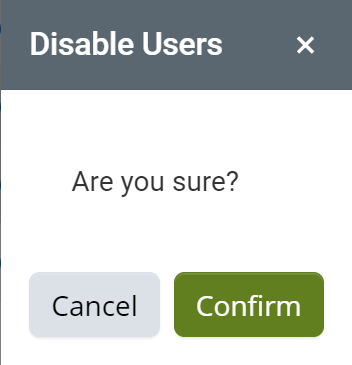
![]() When you click on the "Disable Selection" button, the following prompt will show up. Click on the "Confirm" button.
When you click on the "Disable Selection" button, the following prompt will show up. Click on the "Confirm" button.
![]() The selected accounts will be disabled.
The selected accounts will be disabled.
Send Welcome emails to the Selected User Accounts
To send the welcome email to multiple users, follow the steps below the image:
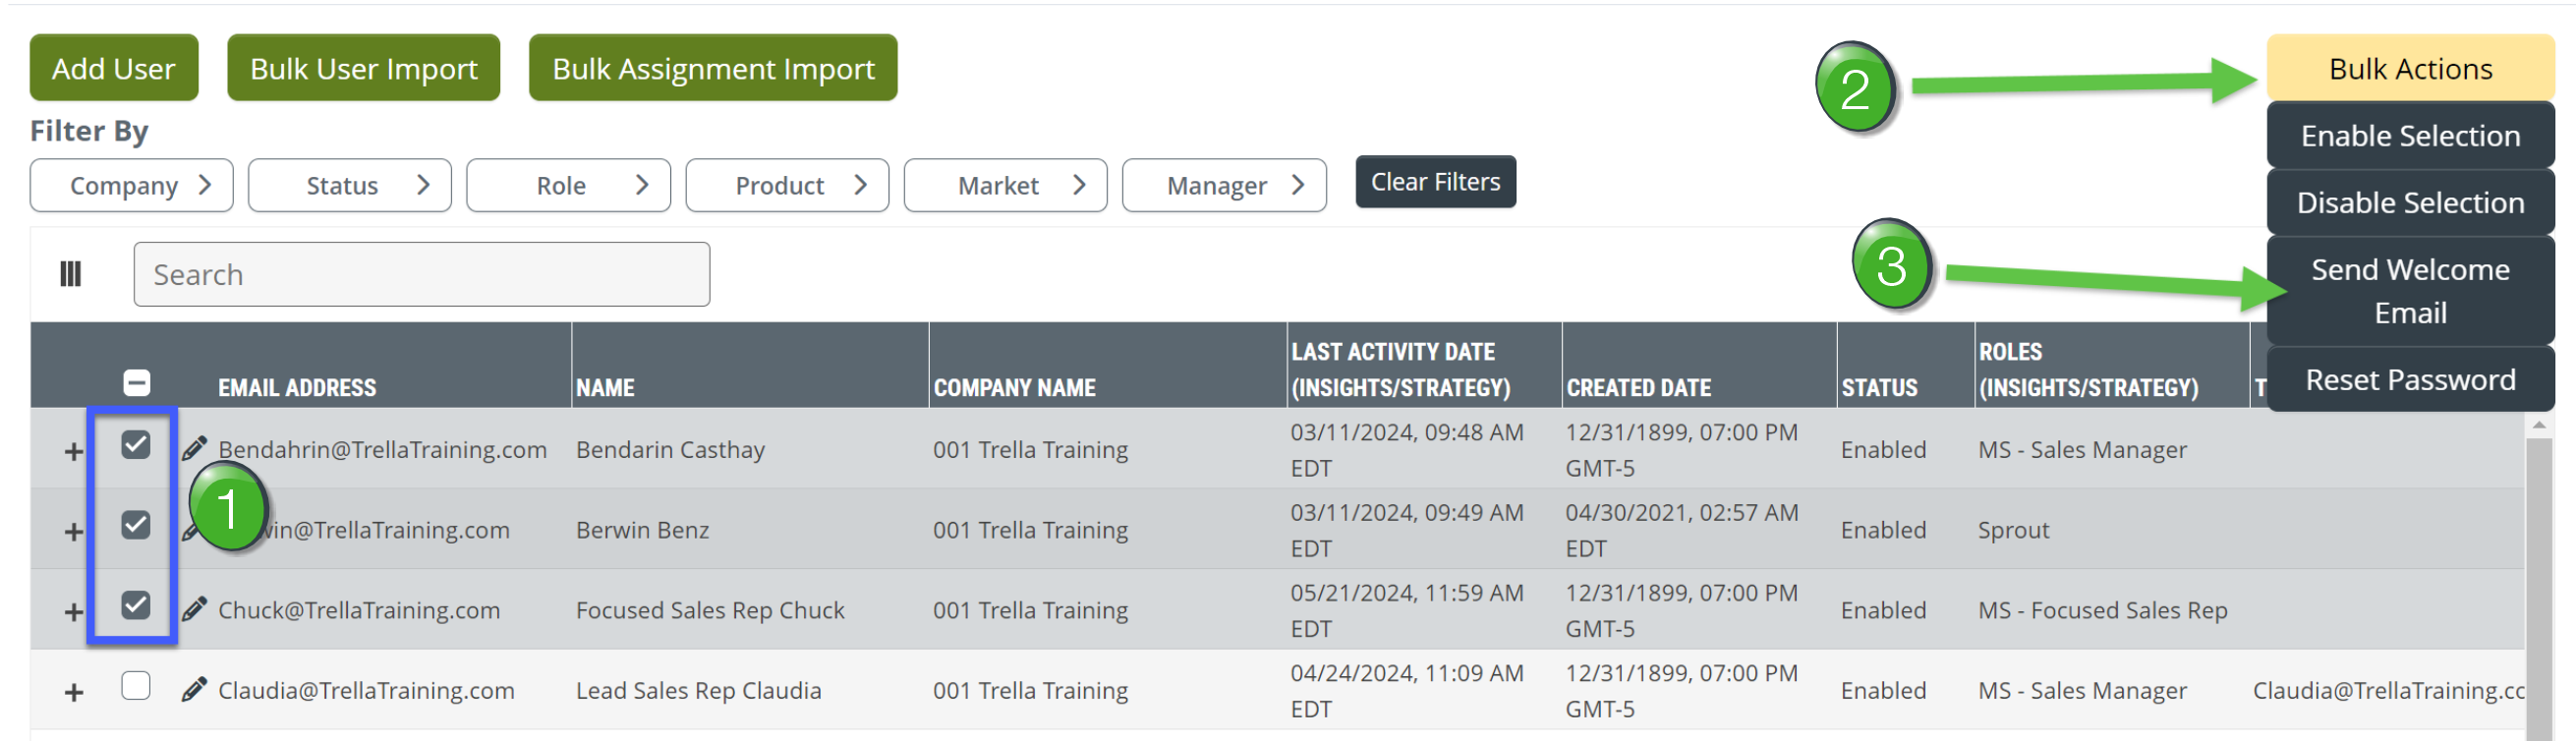
![]() Select the desired user accounts by clicking on the checkboxes to the left of their email addresses.
Select the desired user accounts by clicking on the checkboxes to the left of their email addresses.
![]() Click on the "Bulk Actions" button to open the options available.
Click on the "Bulk Actions" button to open the options available.
![]() Click on the "Send Welcome Email" button.
Click on the "Send Welcome Email" button.
![]() When you click on the "Send Welcome Email" button, the following prompt appear. Click on the "Confirm" button.
When you click on the "Send Welcome Email" button, the following prompt appear. Click on the "Confirm" button.

![]() The Welcome email will be sent to the email address listed in the table.
The Welcome email will be sent to the email address listed in the table.
Reset Passwords for the Selected User Accounts
To reset the password on multiple user accounts, follow the steps below the image:
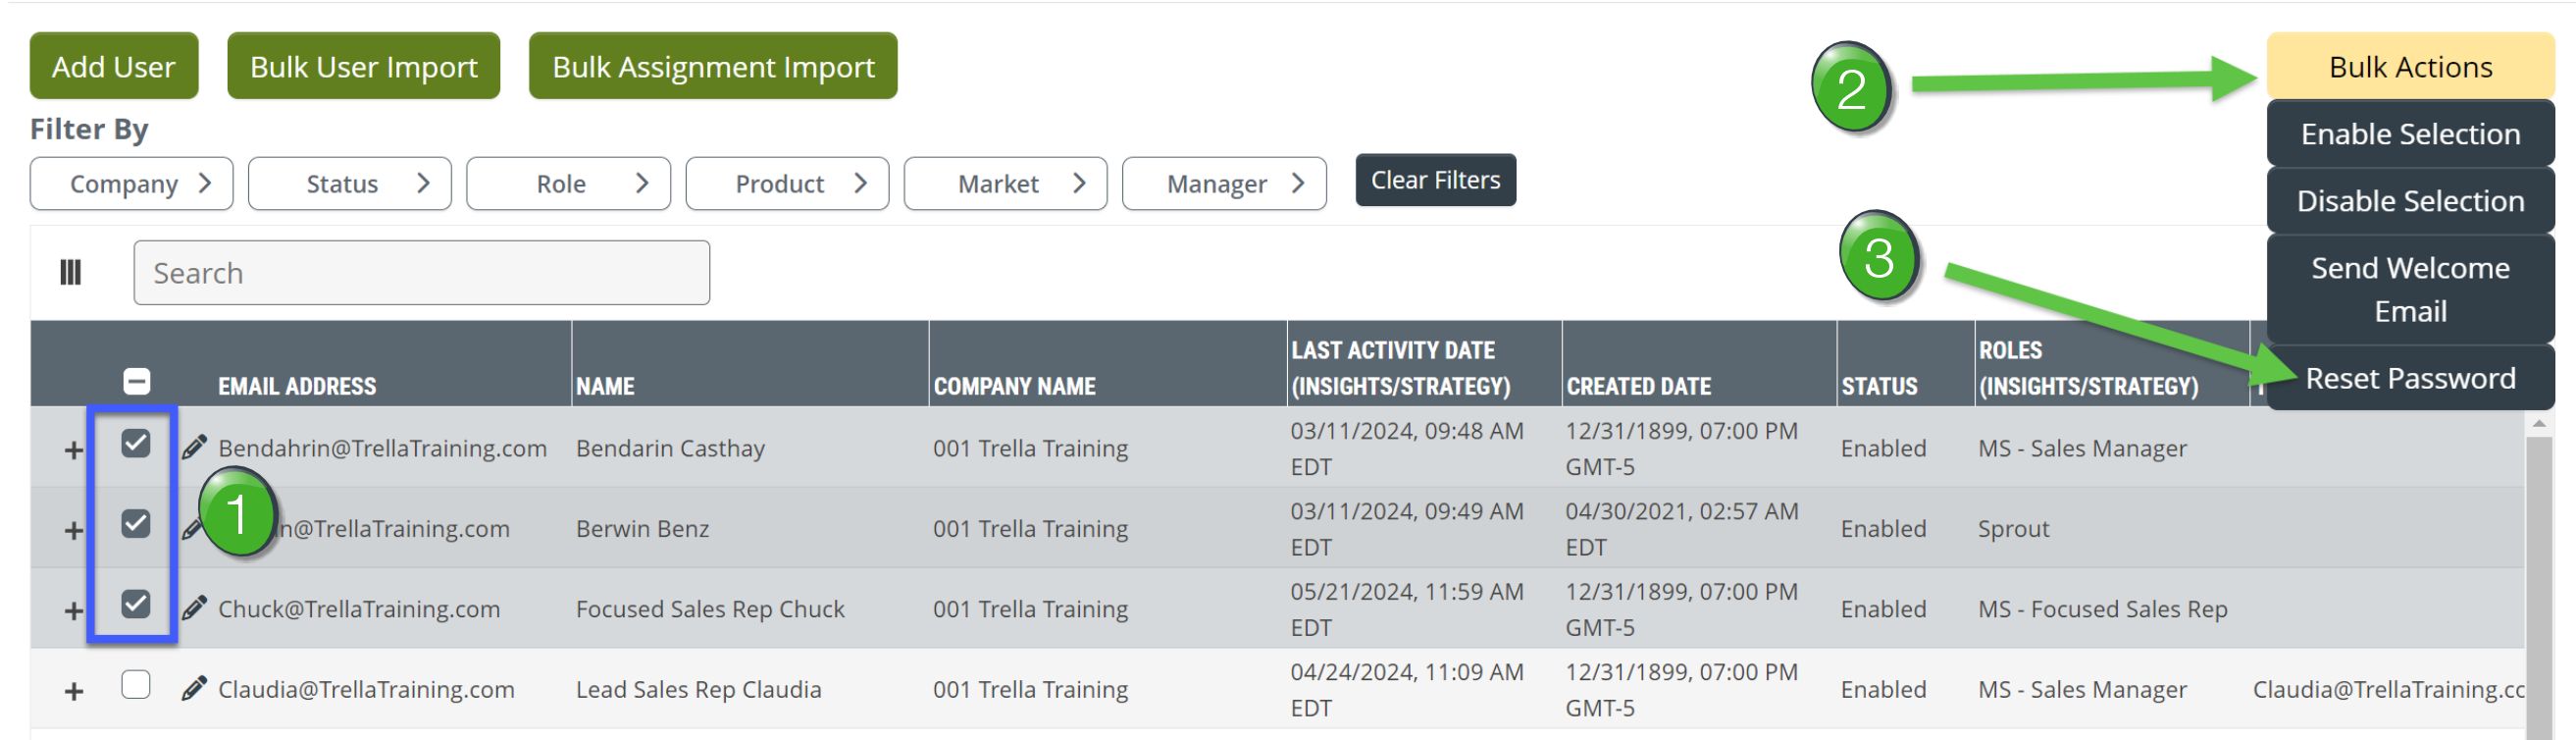
![]() Select the user desired accounts by clicking on the checkboxes to the left of their email addresses.
Select the user desired accounts by clicking on the checkboxes to the left of their email addresses.
![]() Click on the "Bulk Actions" button to open the options available.
Click on the "Bulk Actions" button to open the options available.
![]() Click on the "Reset Password" button.
Click on the "Reset Password" button.
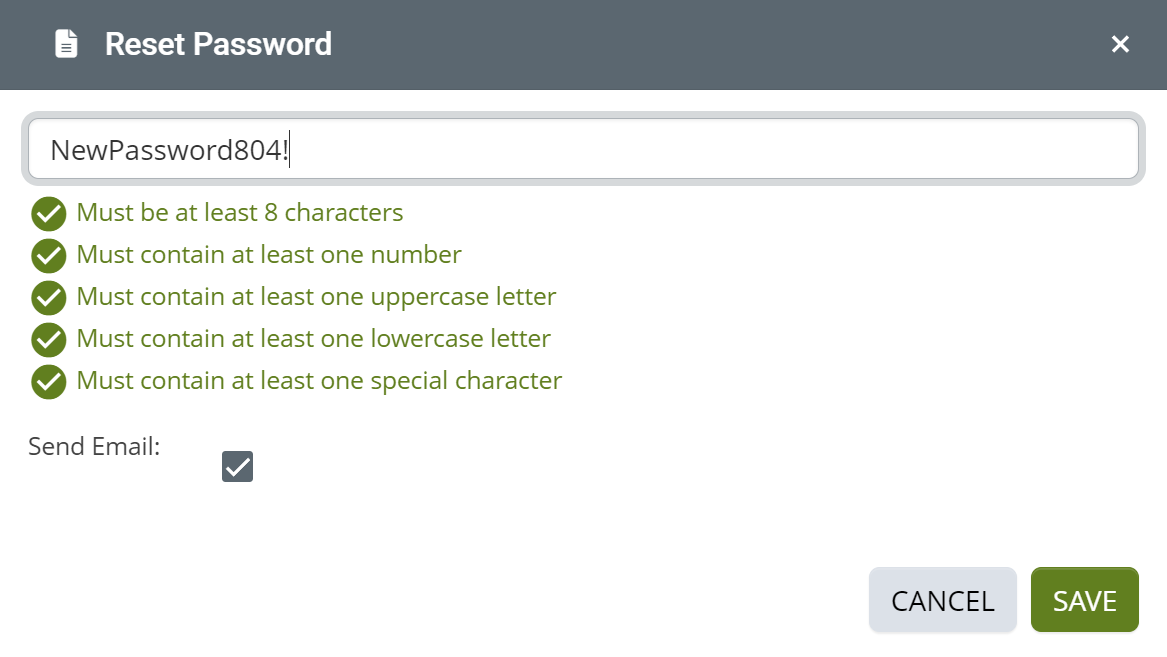
![]() The following interface will open. Create a password that matches the required criteria listed below the empty field. A simple password is acceptable since the users will be required to create a new password when they next log in.
The following interface will open. Create a password that matches the required criteria listed below the empty field. A simple password is acceptable since the users will be required to create a new password when they next log in.
 Additional Details
- If you check the "Send Email" checkbox, all selected users will receive an email with instructions to follow.
- Once you reset a user's password, they will need to login using their email and the chosen password. When they log in, they will be required to set a new password.
- In most cases, as an account administrator, if a user asks you to reset their password, you can suggest that they use the "Forgot your Password?" link on the log in page, which will be faster for both you and the user. Resetting a password for a user is certainly a good process.