Overview
In Trella Insights, on the Explore page, under each tab, there is a single table that displays all providers, post-acute facilities, referrers or suppliers in the states for which your company has a contract. You can filter, sort, and browse this table to narrow the entries displayed to match very specific criteria.
 In this article
This article is an overview of the Explore page that is applicable to any module of Trella Insights. In this article you will find descriptions of the features that are common to any Explore page, with the details necessary to understand how to use the features described.
Differences between the modules
Each module of Trella Insights displays the most relevant metrics depending on your agency's type. For example, Trella Insights for Hospice will have different tables and metrics from Insights for HME/Infusion, Home Health, or Skilled Nursing. We provide different metrics to answer different questions.
![]() In addition, every Explore page has tabs for different types of entities that provide access to metrics relevant for each entity type. These are shown in the following table:
In addition, every Explore page has tabs for different types of entities that provide access to metrics relevant for each entity type. These are shown in the following table:
| Module | Tabs |
| Home Health |  |
| Hospice |  |
| HME/Infusion |  |
| Skilled Nursing |  |
![]() If you look at the table of images above, you can see that there are many different types of organizations or physicians that will be the focus of the different Explore pages. Since this article is an overview of features relevant to all Explore pages, we will use the terms entities or entries to refer to the organization/person represented in each record in the tables.
If you look at the table of images above, you can see that there are many different types of organizations or physicians that will be the focus of the different Explore pages. Since this article is an overview of features relevant to all Explore pages, we will use the terms entities or entries to refer to the organization/person represented in each record in the tables.
Where to find the details for each Explore page
To highlight the differences between each Explore page, there is an additional article for each page for every different entity type in each module. If you want to jump directly to an article with the details, click on one of the links in the table below:
| Module | Home Health | Hospice | HME/Infusion | Skilled Nursing |
|
|
|
|
|


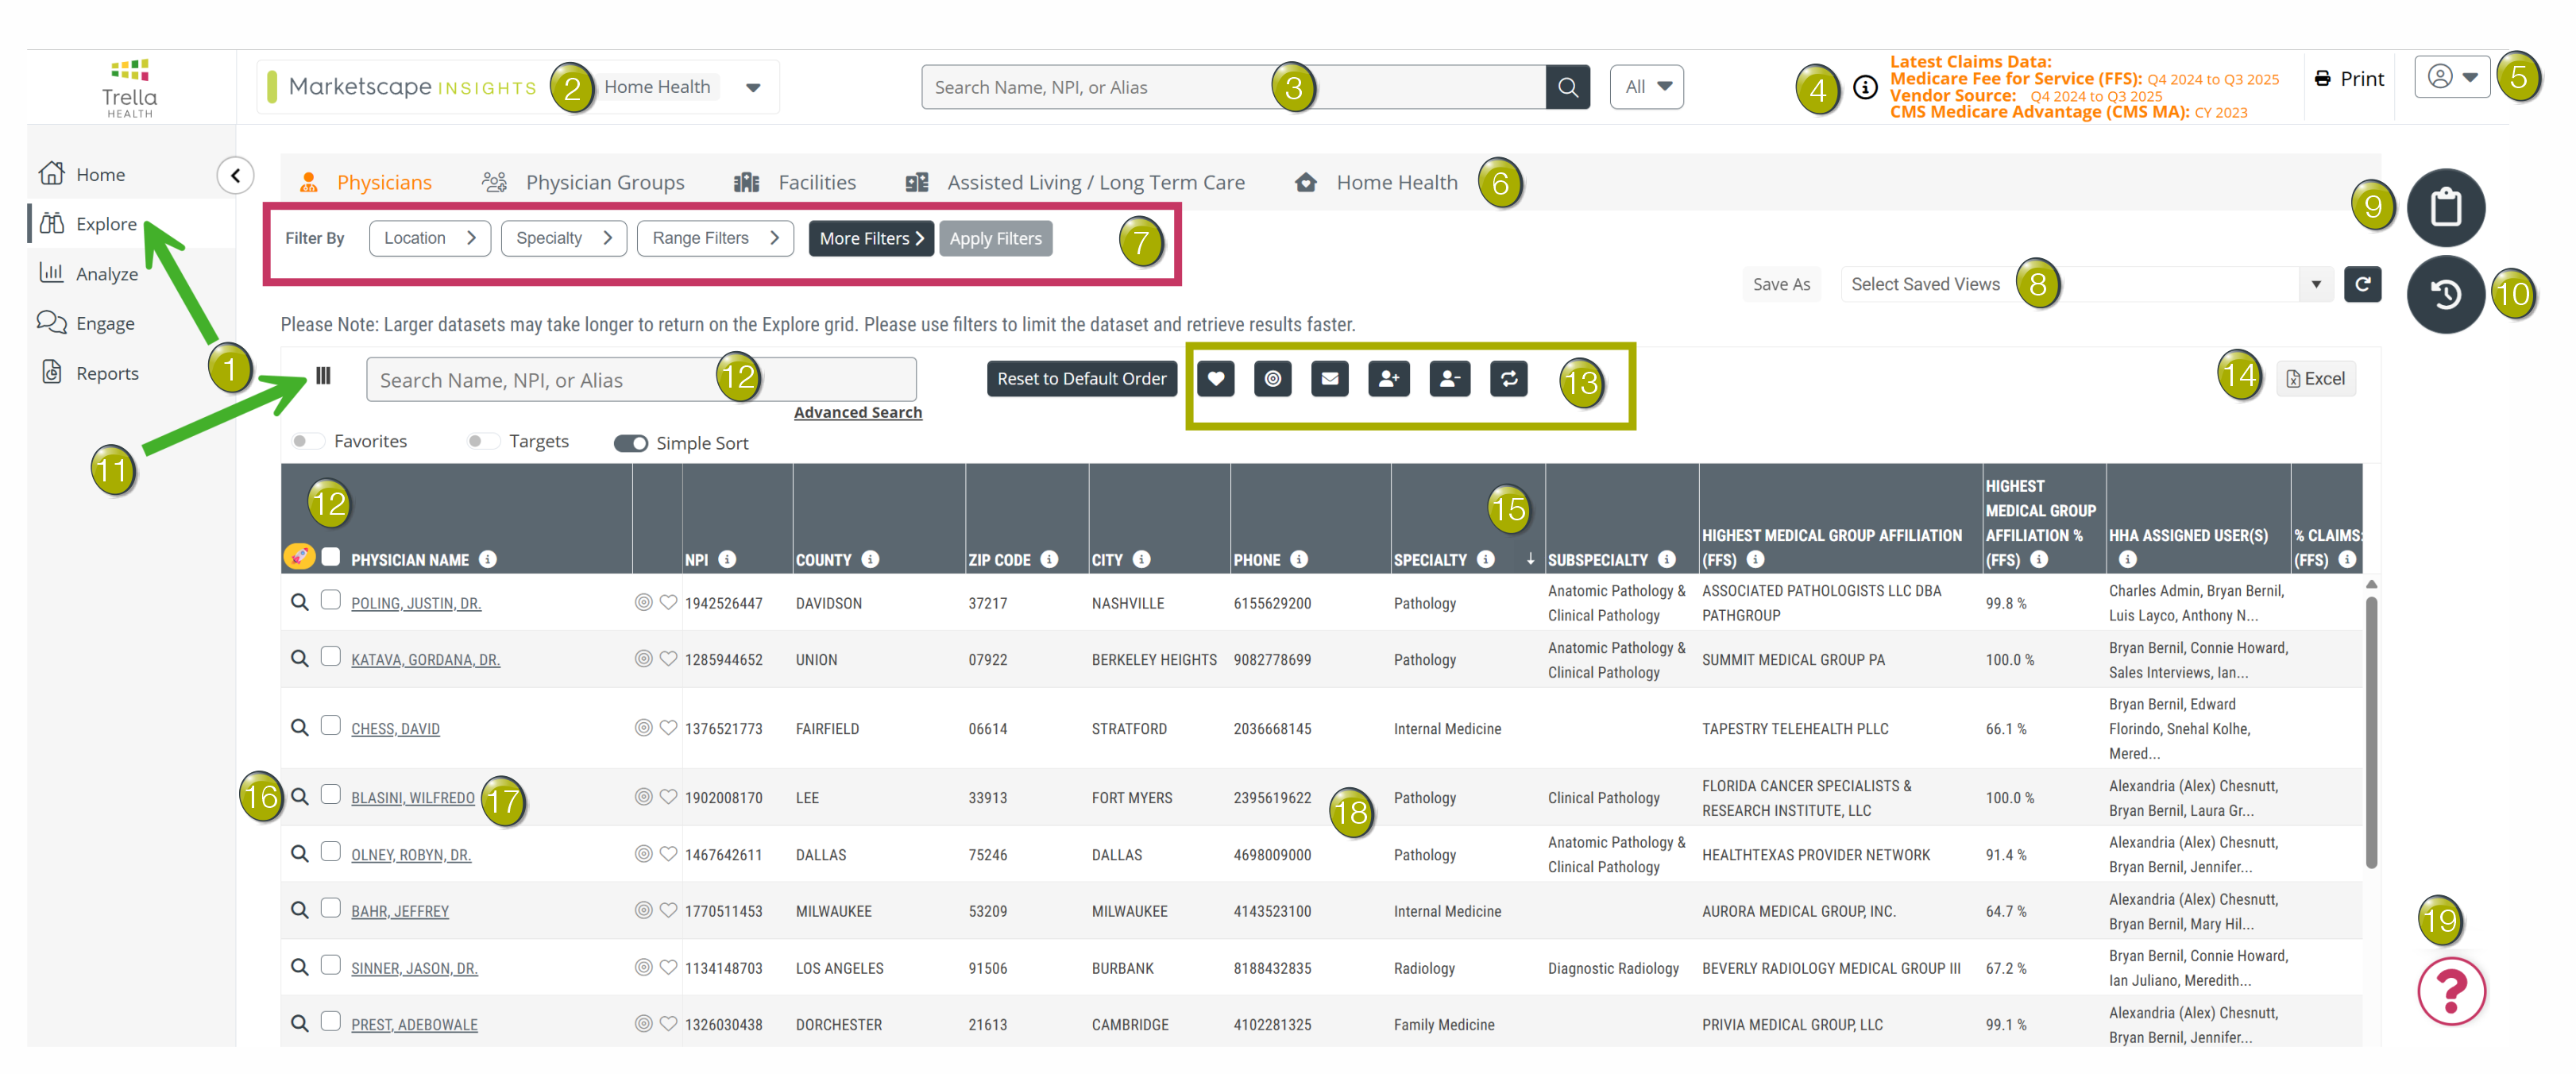
The Explore page
Use the following image as a guide to explore the features and functionality of the Explore page.
![]() Click the matching number below the image to immediately jump to a numbered feature.
Click the matching number below the image to immediately jump to a numbered feature.
|
Click on the "Explore" button to navigate to the Explore page |
 |
|
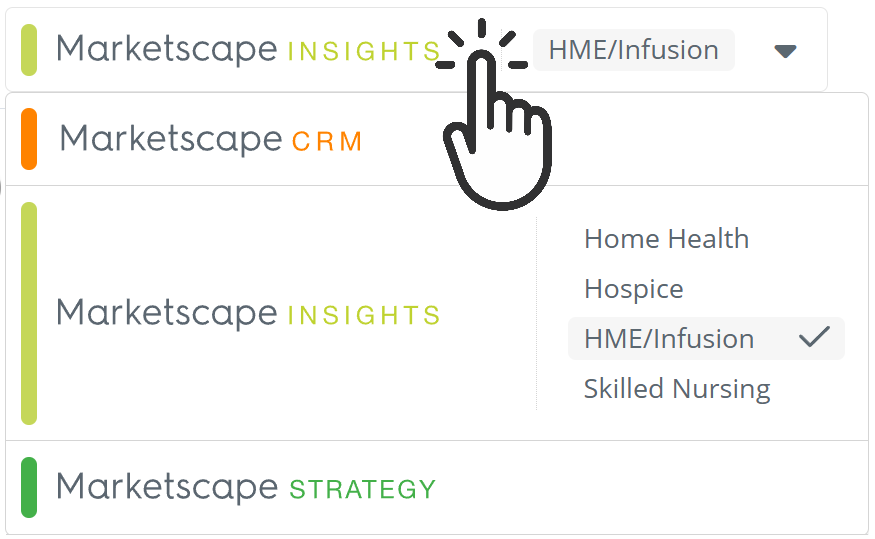
With this open, you can navigate to any Trella Health product to which you have access.
This feature is universal to all Trella Health products. |
 |
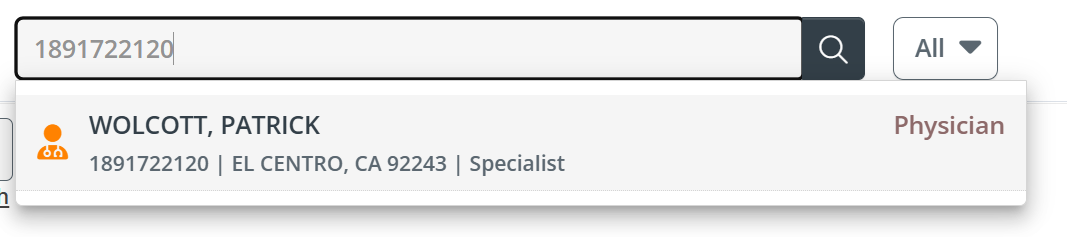
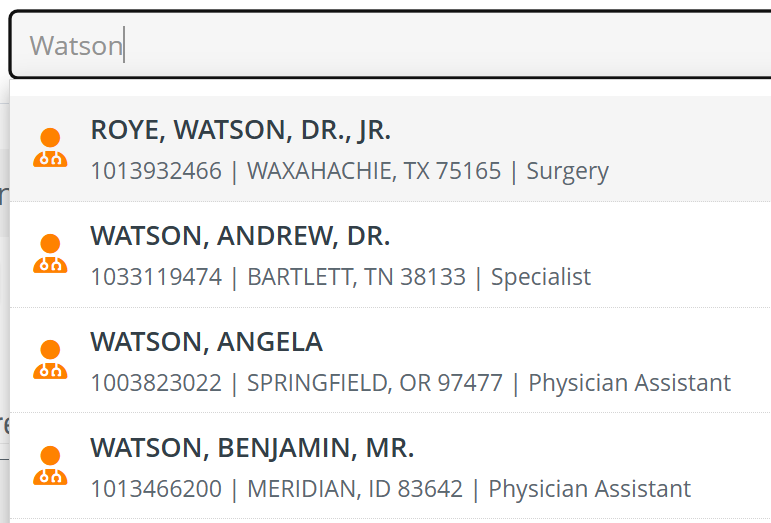
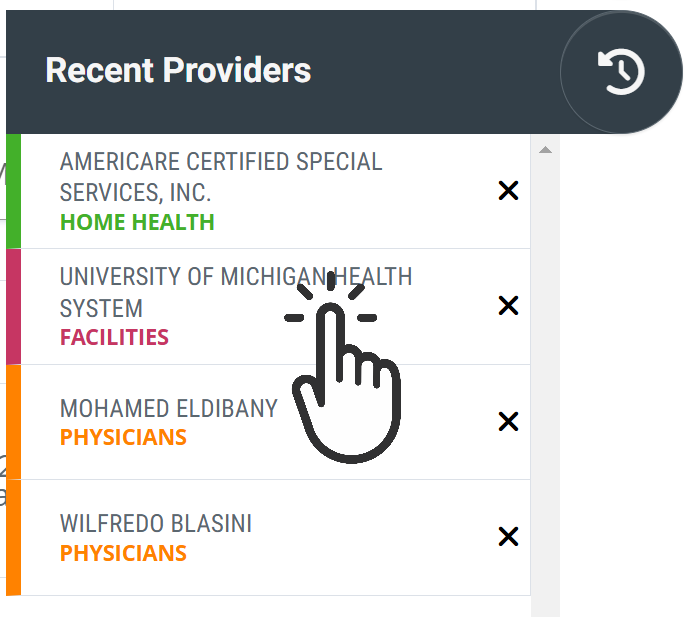
![]() Global Search - To find any entity, you can type in the relevant name or NPI into the search field. For a specific match, a single entry will be shown (left image, below). If your search returns numerous responses, a list will be shown through which you can scroll. (right image)
Global Search - To find any entity, you can type in the relevant name or NPI into the search field. For a specific match, a single entry will be shown (left image, below). If your search returns numerous responses, a list will be shown through which you can scroll. (right image)
 |
|
|
| Clicking on an entry will open the Analyze page for the entry you chose. | ||
|
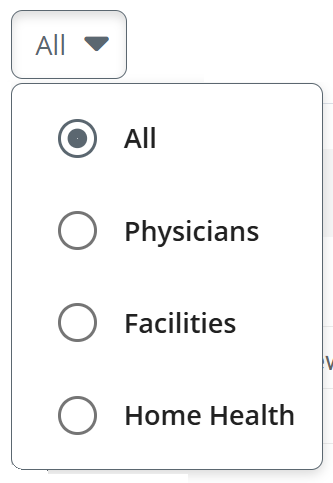
Click the "All" button
|
 |
|
![]() Data sources and reporting periods - This block of content shows you the reporting periods for the three different data sources Trella analyzes to include in metrics included in Trella products.
Data sources and reporting periods - This block of content shows you the reporting periods for the three different data sources Trella analyzes to include in metrics included in Trella products.

![]() For more information about Trella's data, see Data Sources, and the Data Release Timeline.
For more information about Trella's data, see Data Sources, and the Data Release Timeline.
|
|
 |
![]() Entity Type - Clicking on the tab for a specific entity type will open a new tab of metrics focused on the selected entity type. Click on the tab for which you want to browse entries. The image below is from Trella Insights for HME/Infusion.
Entity Type - Clicking on the tab for a specific entity type will open a new tab of metrics focused on the selected entity type. Click on the tab for which you want to browse entries. The image below is from Trella Insights for HME/Infusion.
![]() To see a list of existing tabs for each module, see Where to find the details - above.
To see a list of existing tabs for each module, see Where to find the details - above.
![]() Filters - The filters are a powerful tool to help you find specific entries in the main table using selected criteria. Using filters you can quickly narrow the entries and metrics in the table to specific location(s), counts of patients, code sets, and a lot more.
Filters - The filters are a powerful tool to help you find specific entries in the main table using selected criteria. Using filters you can quickly narrow the entries and metrics in the table to specific location(s), counts of patients, code sets, and a lot more.
![]() In almost every use of the Explore page, you will start by setting filters.
In almost every use of the Explore page, you will start by setting filters.

![]() The filters available are different for each line of business or entity type. The image above is an example from the Trella Insights for Skilled Nursing, on the Hospitals & Agencies Explore page.
The filters available are different for each line of business or entity type. The image above is an example from the Trella Insights for Skilled Nursing, on the Hospitals & Agencies Explore page.
Quick Examples
Location Filter
|
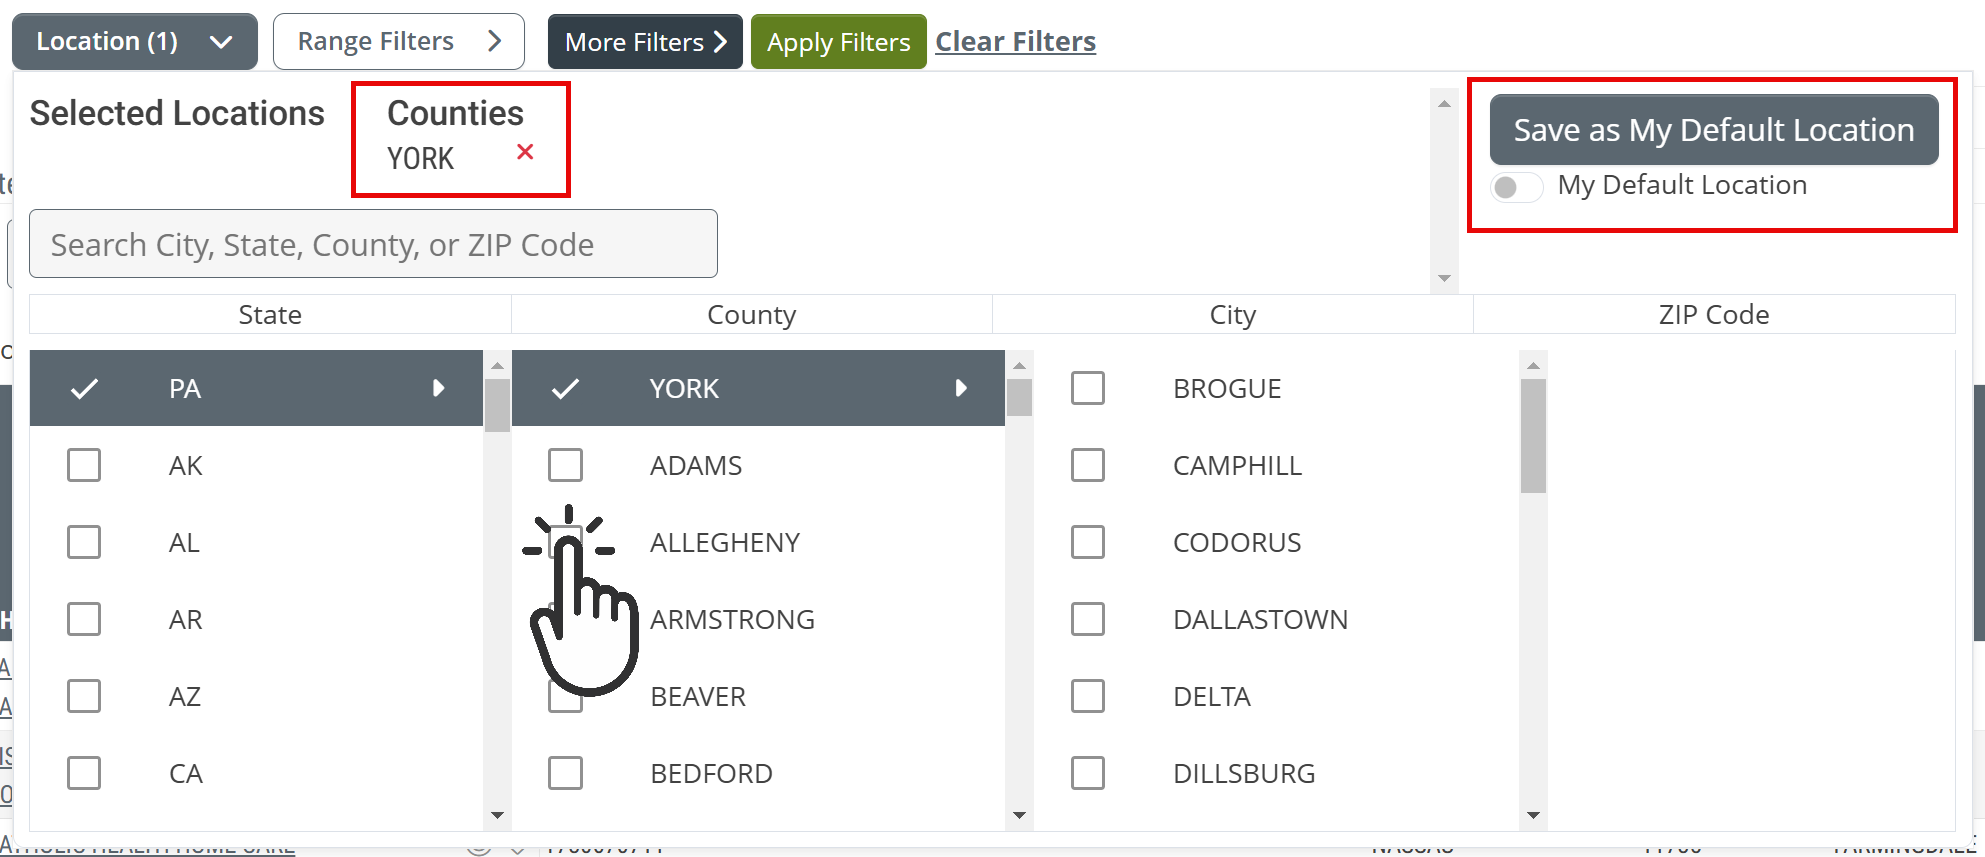
Use case - you want to look at entities in a single county or city. Click on the Location filter button to open the interface. You can then select a state or states, and any number of counties in the chosen states.
|
 |
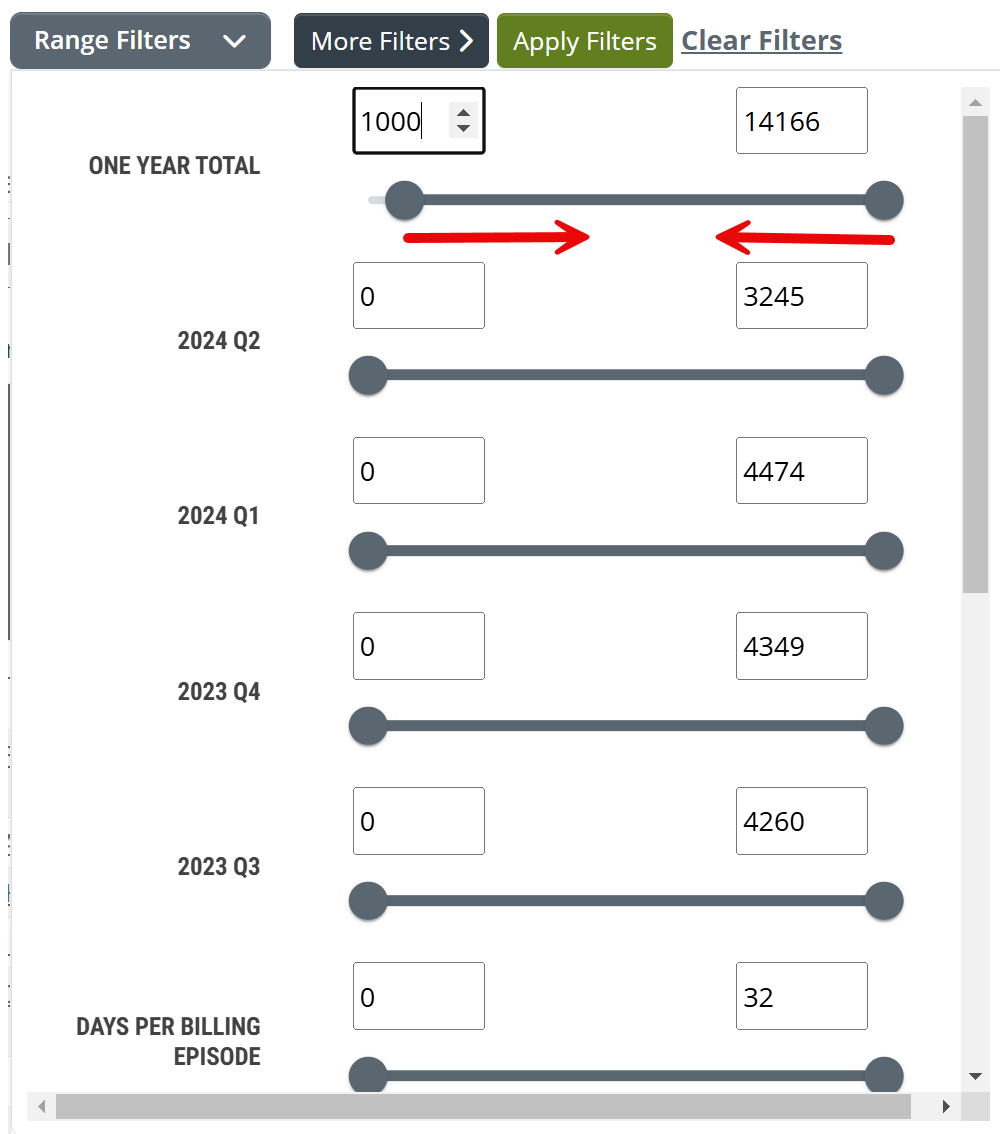
Range Filters
|
Use Case - you want to find entities that treat a specific number of patients in a year. Range filters allow you to select a numeric range for several different metrics in the table. You can drag the sliders or type numbers into the fields.
|
 |
![]() For more information on using filters, see Filters - Overview and Strategy. This linked article contains general use instructions.
For more information on using filters, see Filters - Overview and Strategy. This linked article contains general use instructions.
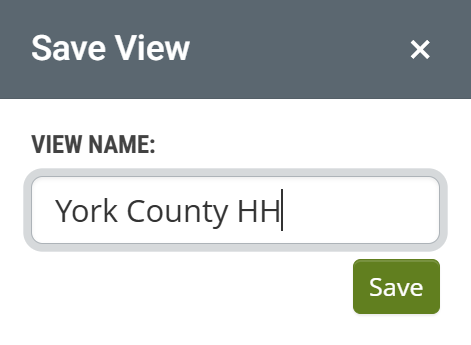
![]() Views - After you set up your filters and sorting, you can save those settings in a view using the "Save As" button to the left of the "Select Saved Views" field. When you save the current settings in a view, you will be able to name the view, and then, you will be able to select the view again later.
Views - After you set up your filters and sorting, you can save those settings in a view using the "Save As" button to the left of the "Select Saved Views" field. When you save the current settings in a view, you will be able to name the view, and then, you will be able to select the view again later.
![]() This will allow you to make custom display settings for the table once and use those settings over and over. This will be especially helpful because the data in Trella Insights is updated quarterly.
This will allow you to make custom display settings for the table once and use those settings over and over. This will be especially helpful because the data in Trella Insights is updated quarterly.
Steps
 | |
| When you click the "Save As" button to the left of the "Select Saved Views" field, the dialog box pictured to the right will open. |  |
|
 |
|
| |
|
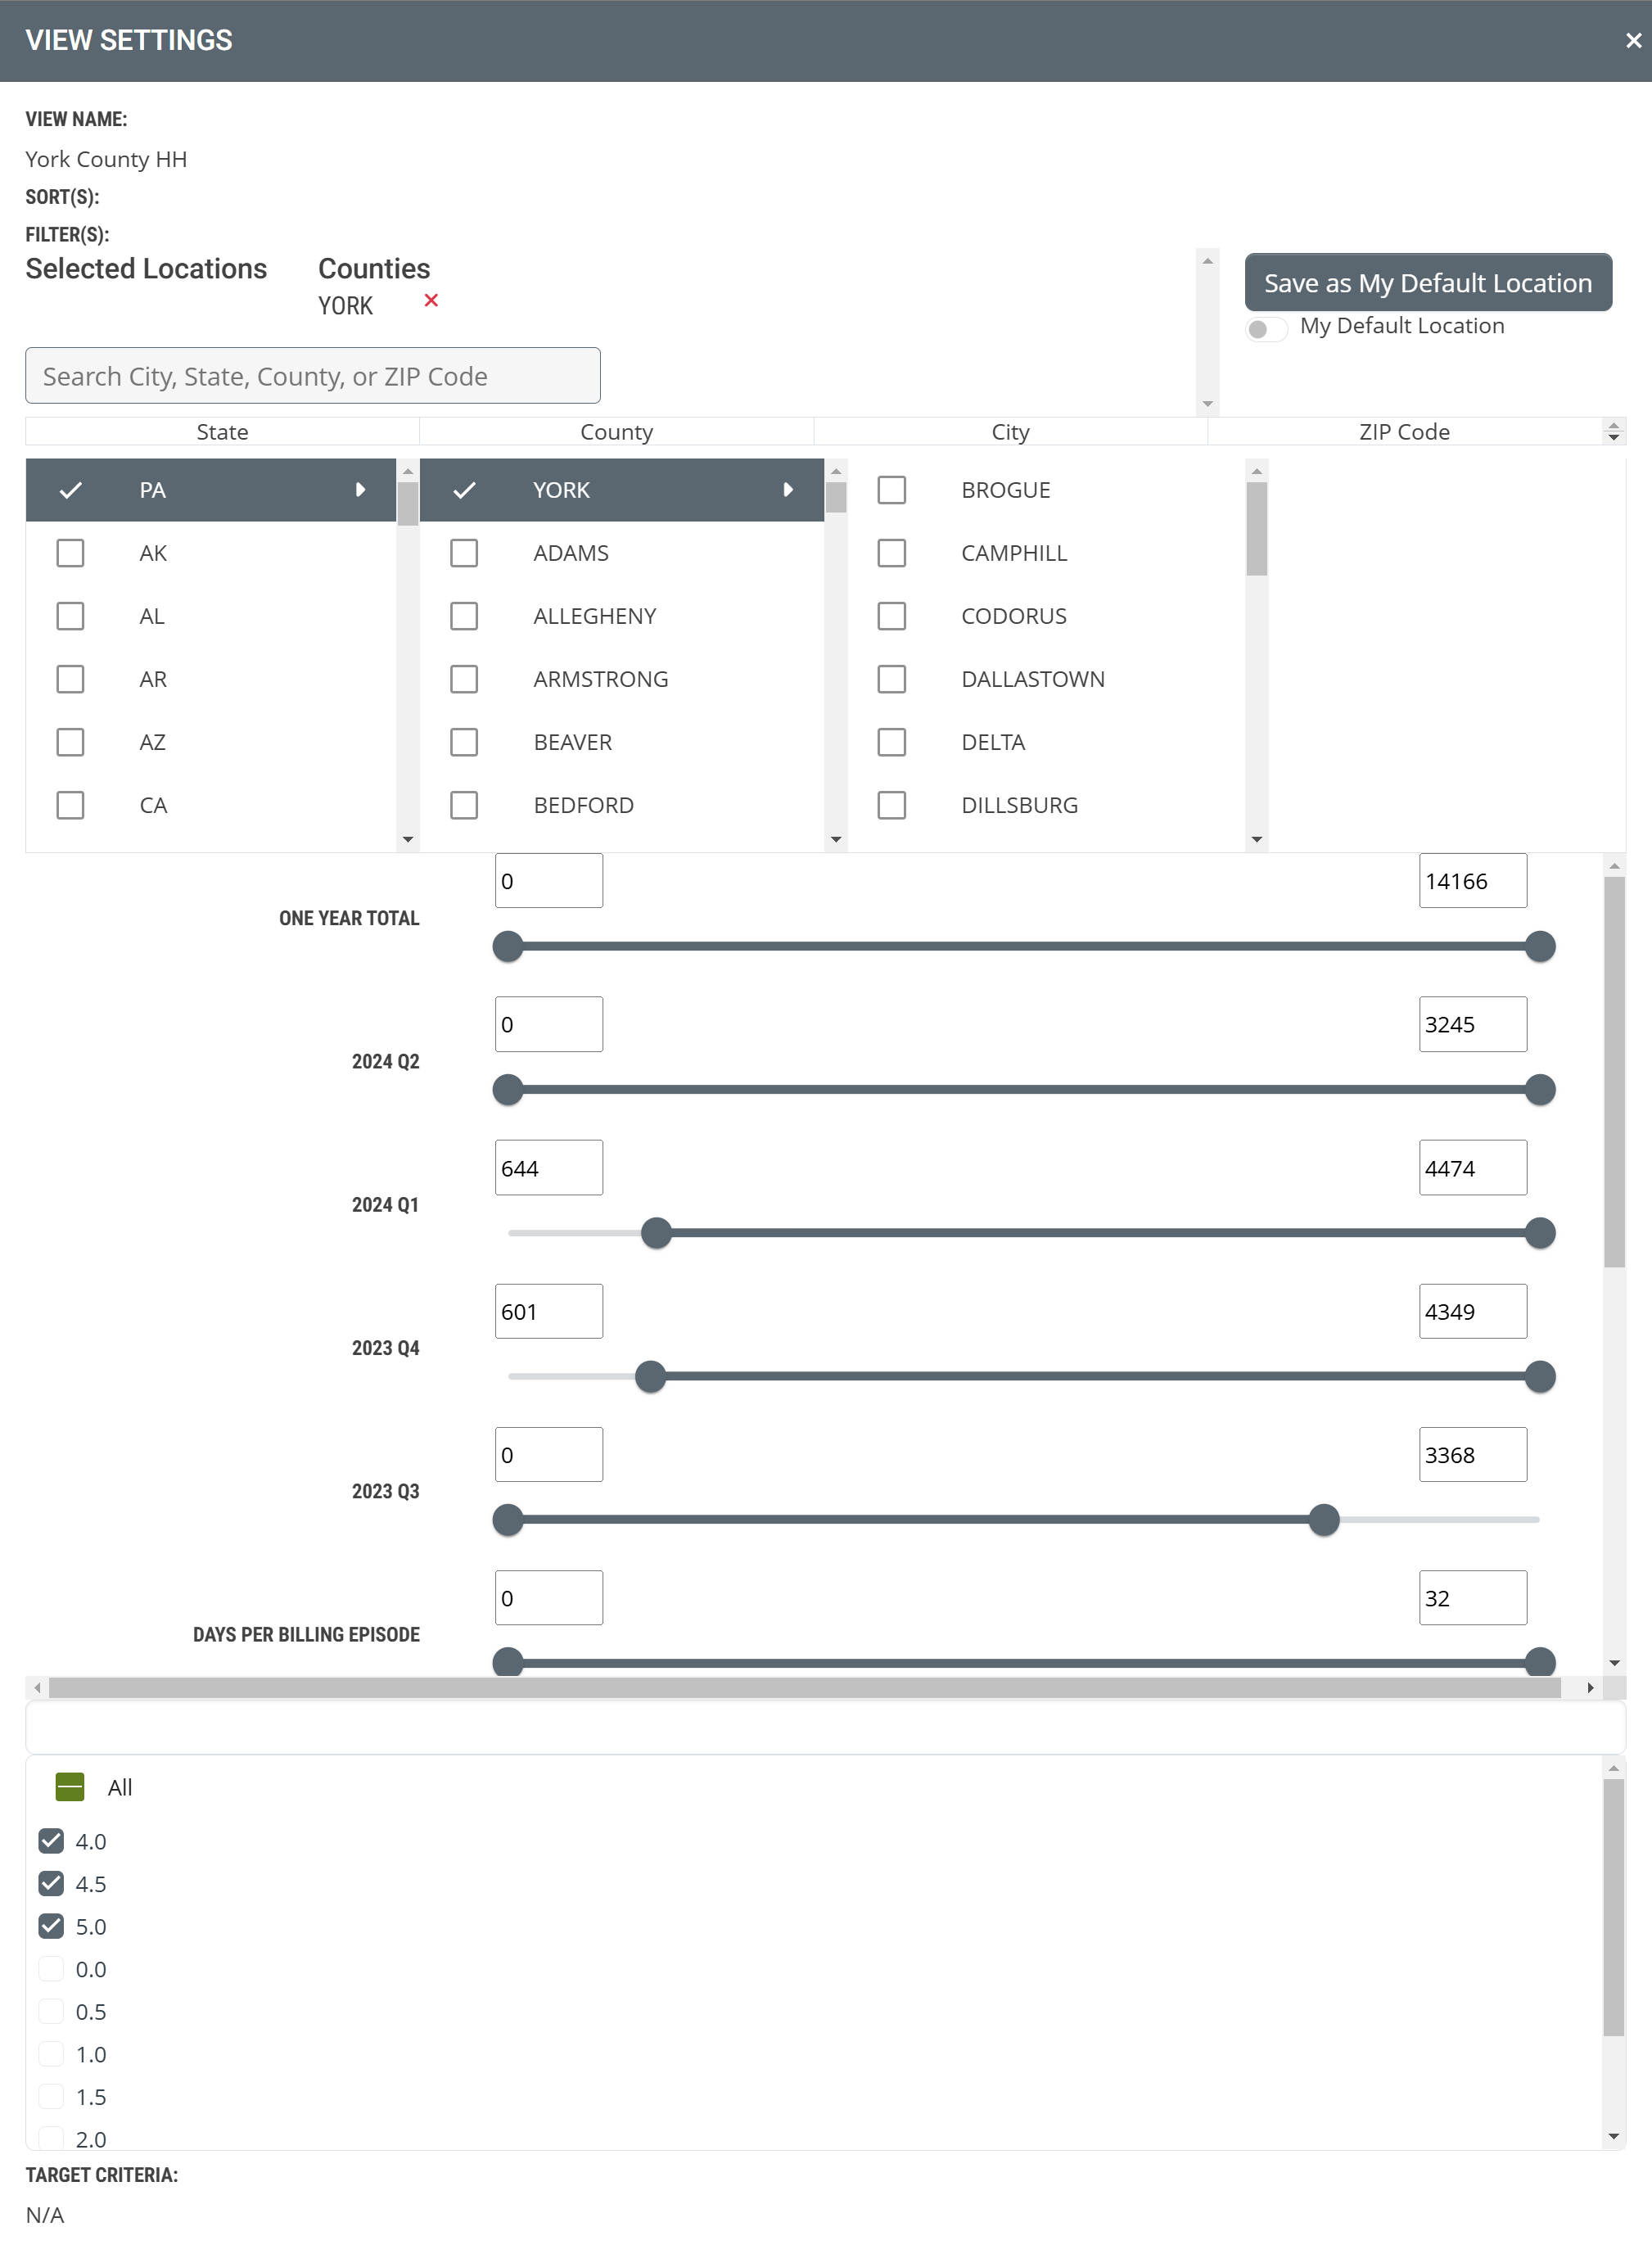
The image in the row above shows the options for the active view. Delete - Since the view we created above is visible as the active view, we can delete it by clicking the delete button.
Save As - You can always save a view with a different name, or with the same name if you made changes. View Details - Click the
Reset Changes - If you make changes that you don't want to save, click the
|
 |
|
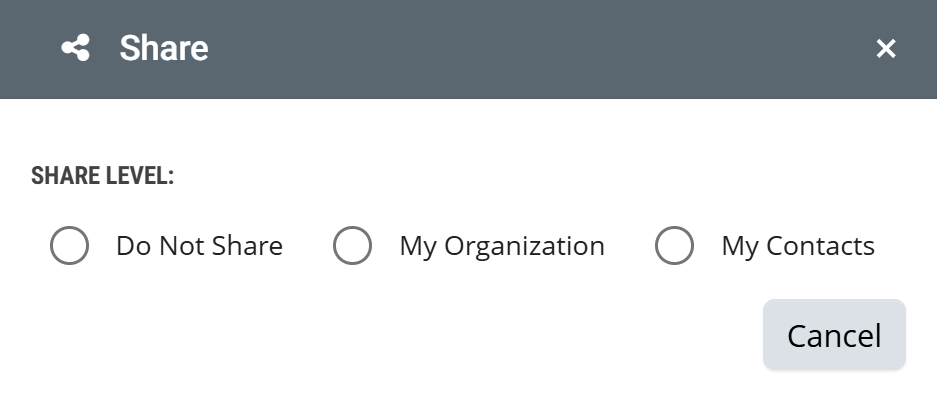
Sharing a View - Once you have created a view, you are able to share the view you created with other users by clicking the "Share View" button. | |
|
When you click the "Share View" button, the dialog box to the right will open. Do Not Share - If you have previously shared the active view, you can turn off the sharing by making this selection. My Organization - This option will share the view with every user in your company.
|
Three Options available
|
|
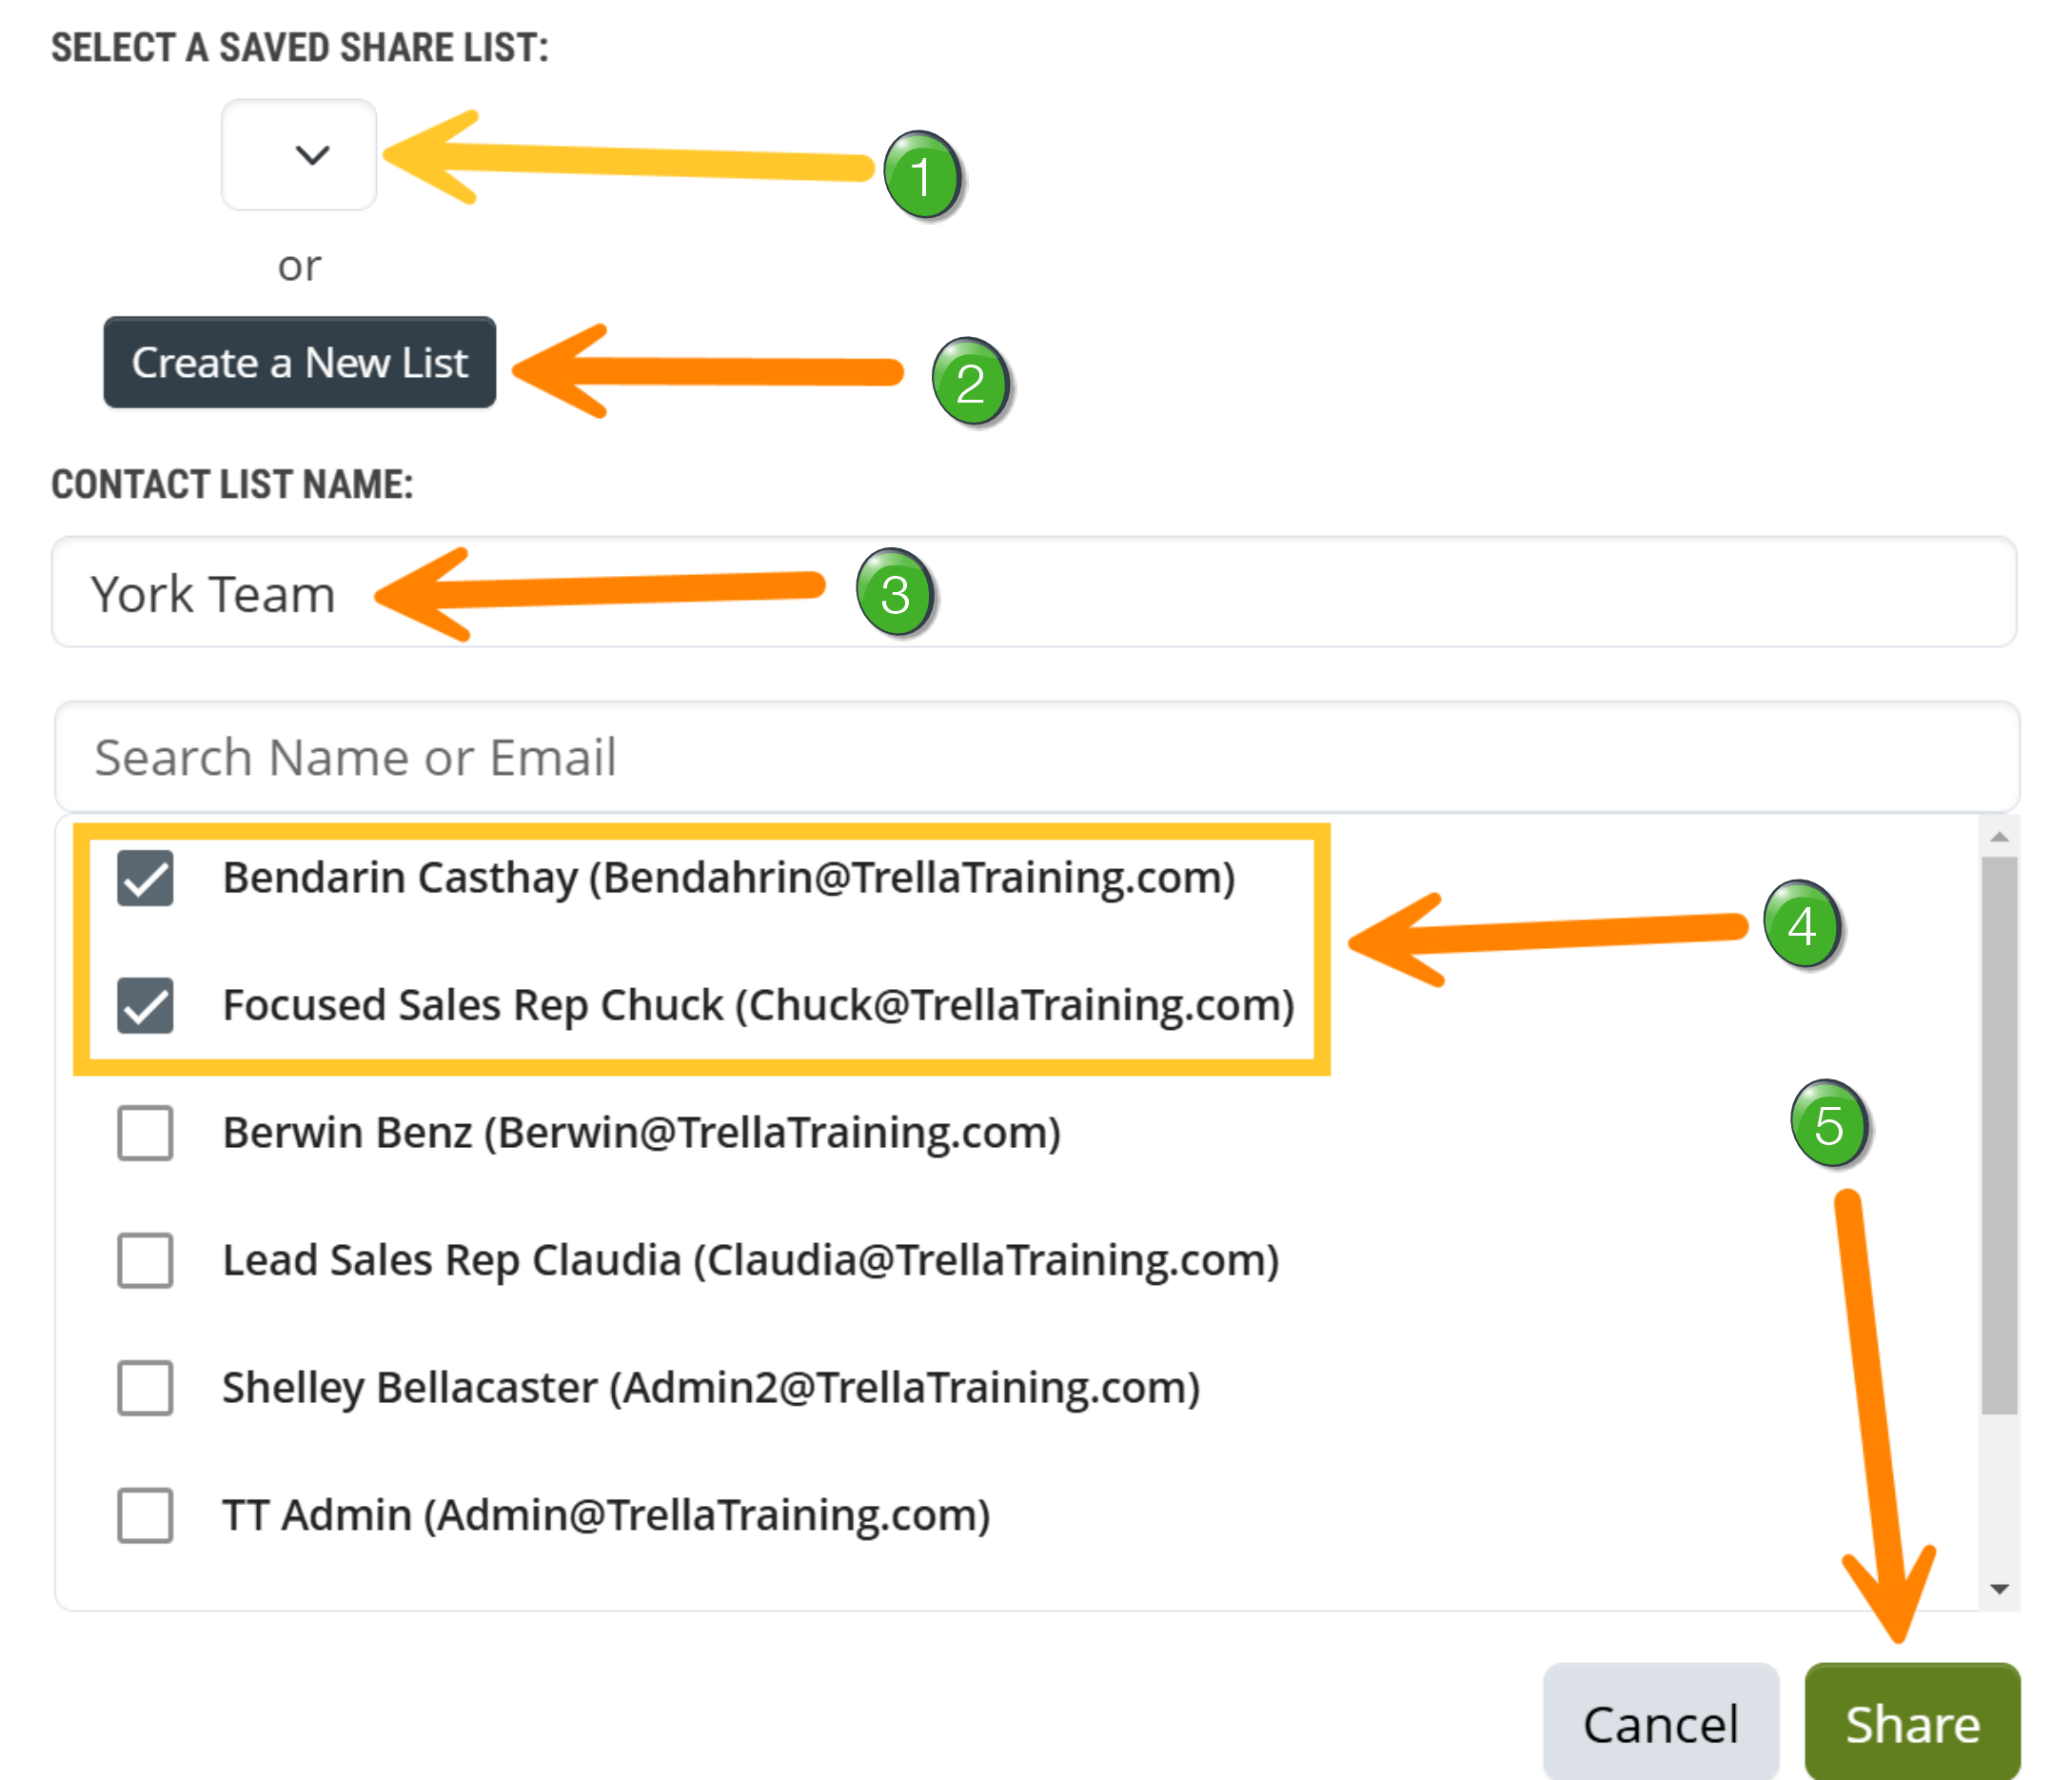
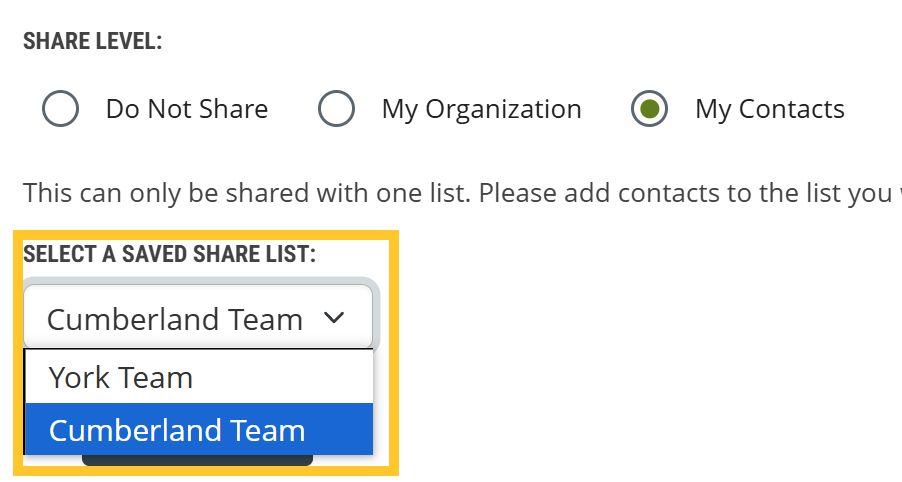
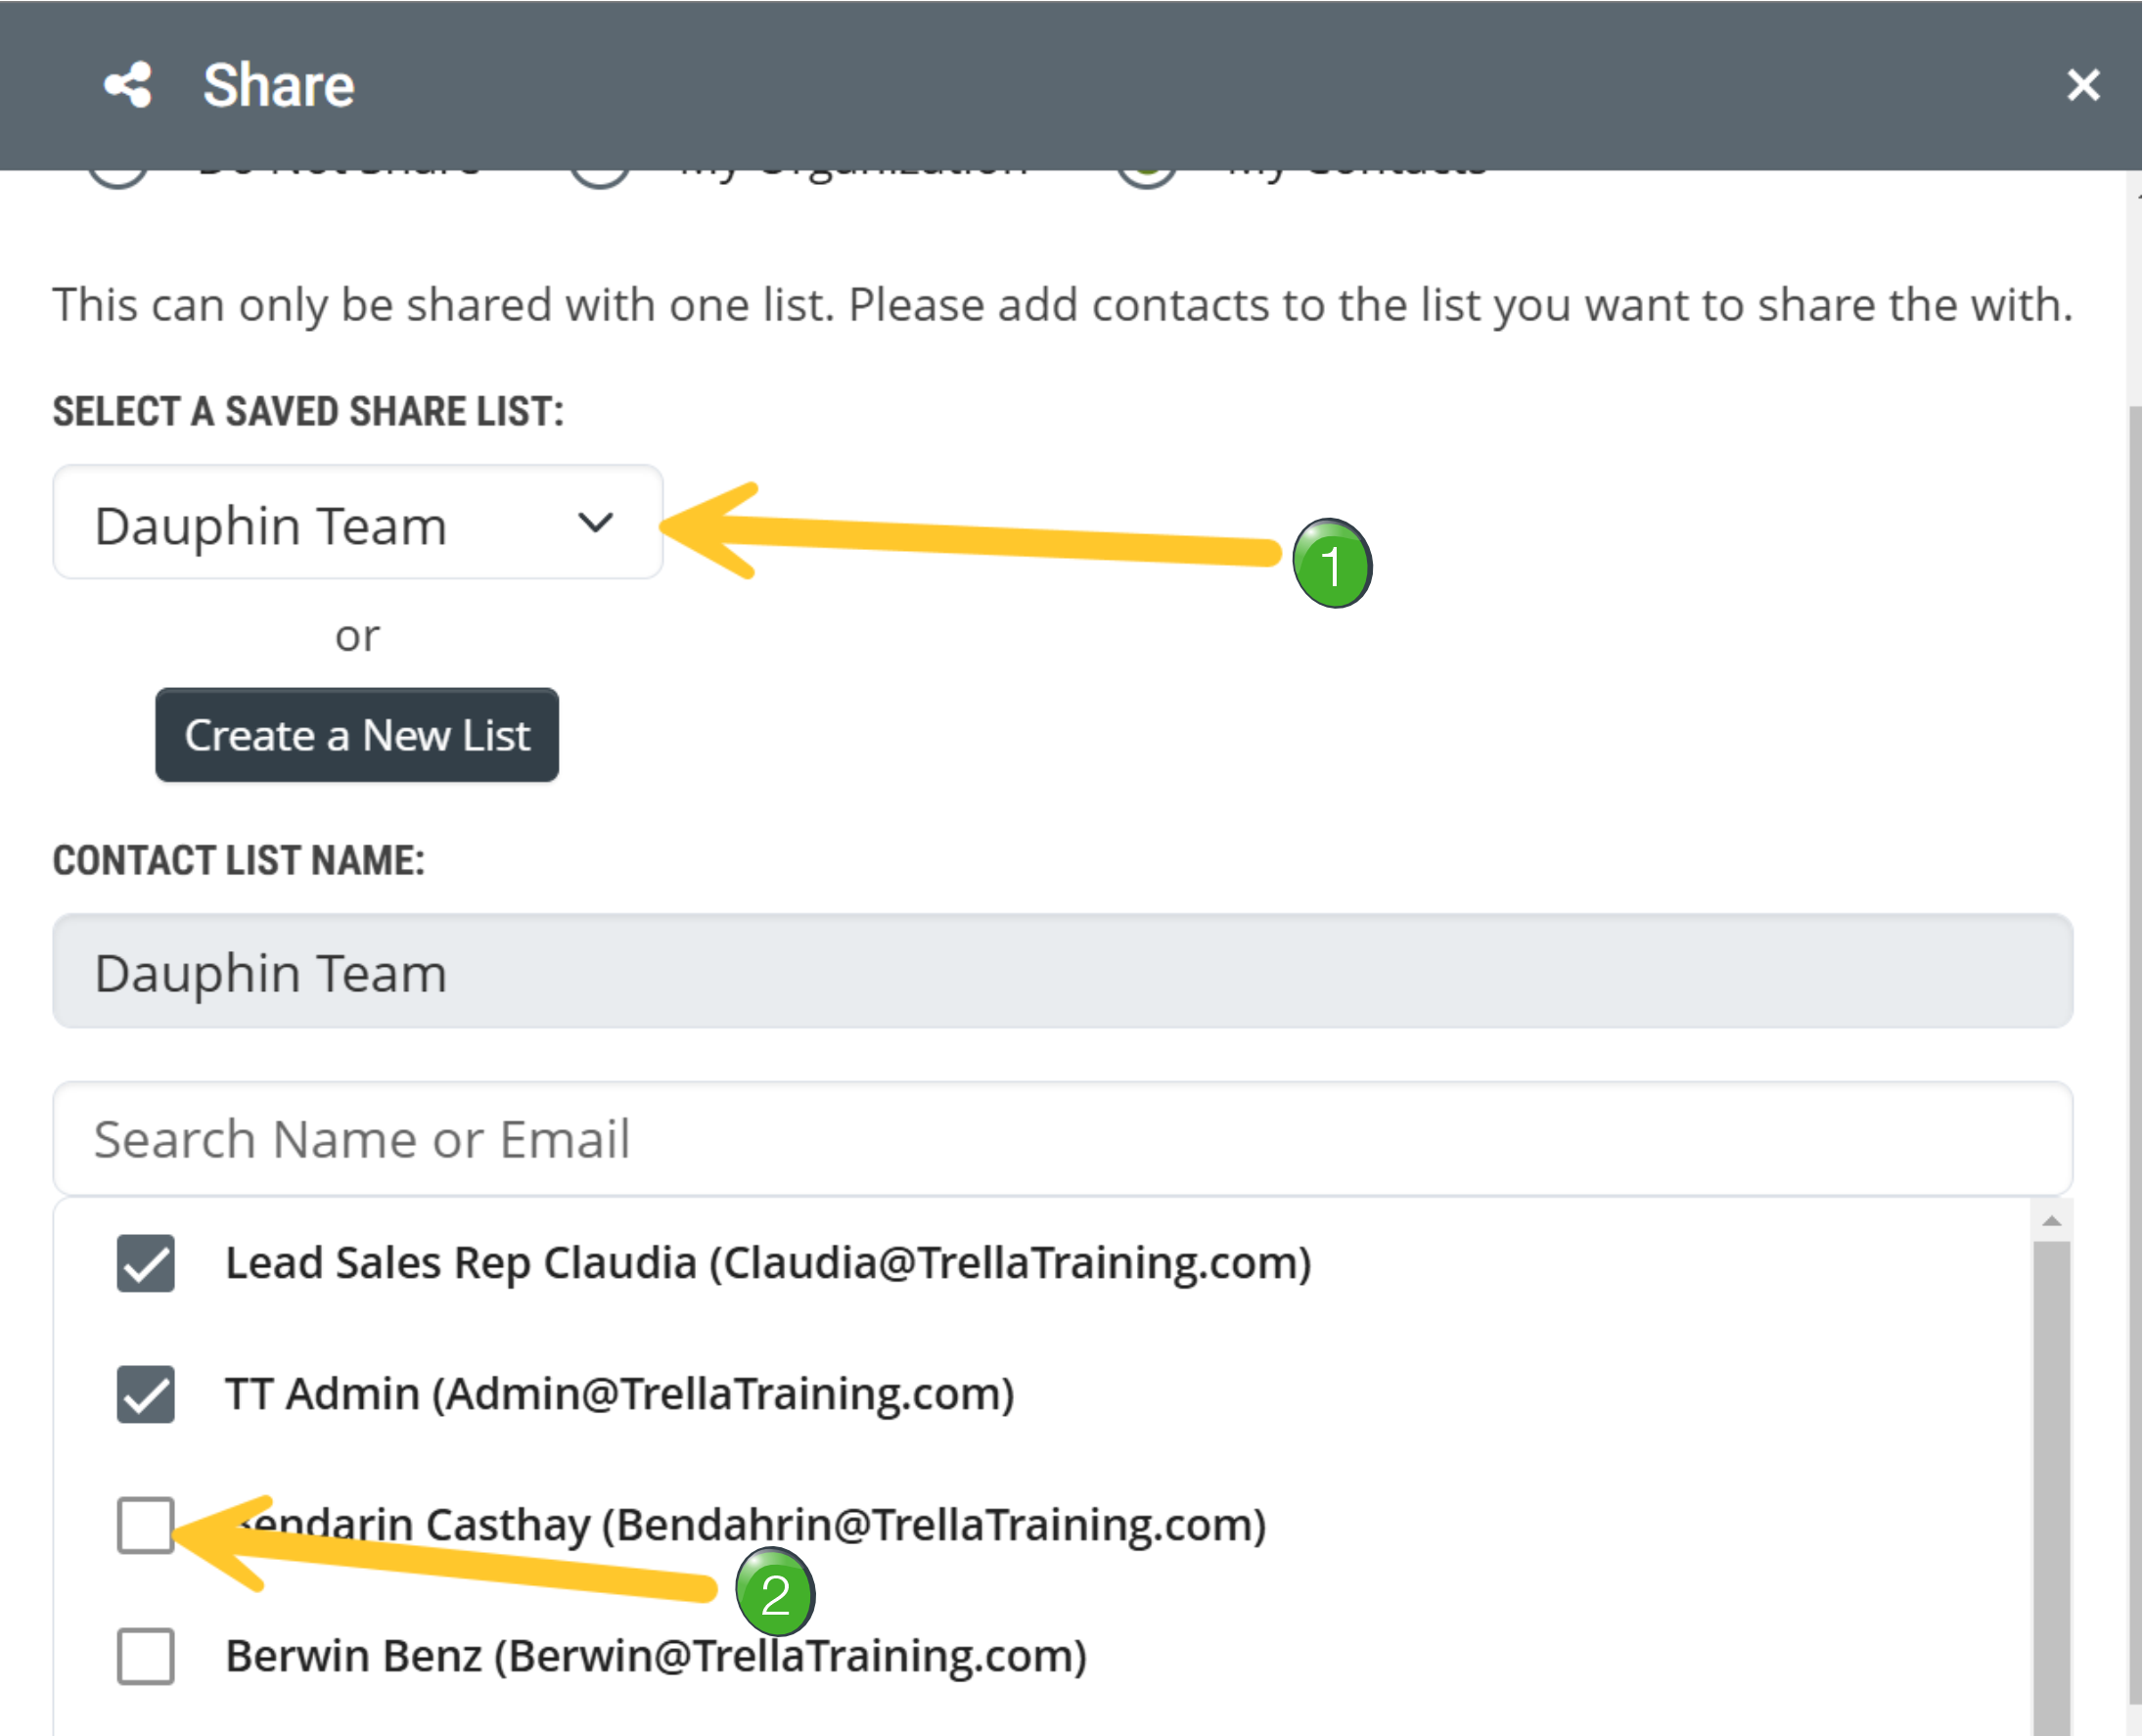
My Contacts - Selecting this option will open the additional list shown in the image on the right. To share the view, you will need to choose a share list. You have two options to choose from:
|
 |
|
A confirmation will appear at the top of the screen that includes the view shared and the name of the share list. (The image below is from another team from the image above.)
| |
|
Select a Share List - The image to the right shows an example of some saved share lists. If you wish to share an additional view with an existing share list, select the share list from the selections in the dropdown and click the "Share" button.
|
 |
|
Add/Remove Users - Each saved view can only be shared to a single group of users. However, you can add or remove users from a share list at any time. With the view active (open) on the Explore page;
|
 |

|
Click on the checkbox to the left of a listed entry to add it to a presentation. |
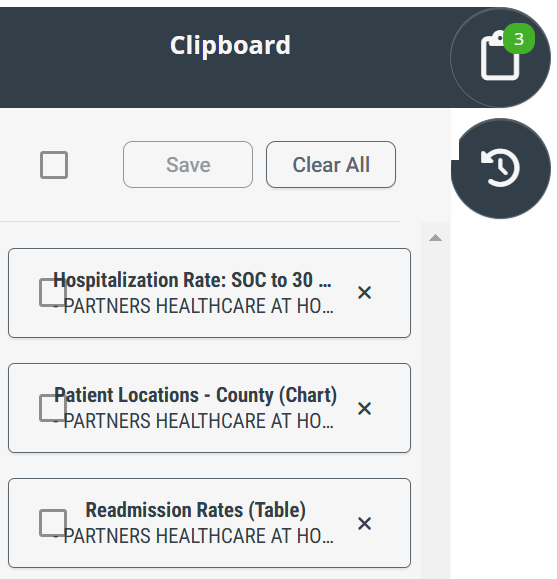 |
![]() The Explore page table can't be added to the clipboard - there are too many metrics and entries. In general, you would only use the clipboard tool on the Engage page, although you have the option of looking at your clipboard list with the Explore page open.
The Explore page table can't be added to the clipboard - there are too many metrics and entries. In general, you would only use the clipboard tool on the Engage page, although you have the option of looking at your clipboard list with the Explore page open.
|
|
 |
![]() Columns - You can choose which columns are displayed in any Explore page table. In addition, you can re-arrange the columns.
Columns - You can choose which columns are displayed in any Explore page table. In addition, you can re-arrange the columns.
Choosing Columns
To select which columns are visible on any Explore page follow these steps:
- Click on the
 icon at the top left of the table. The following dropdown selection opens:
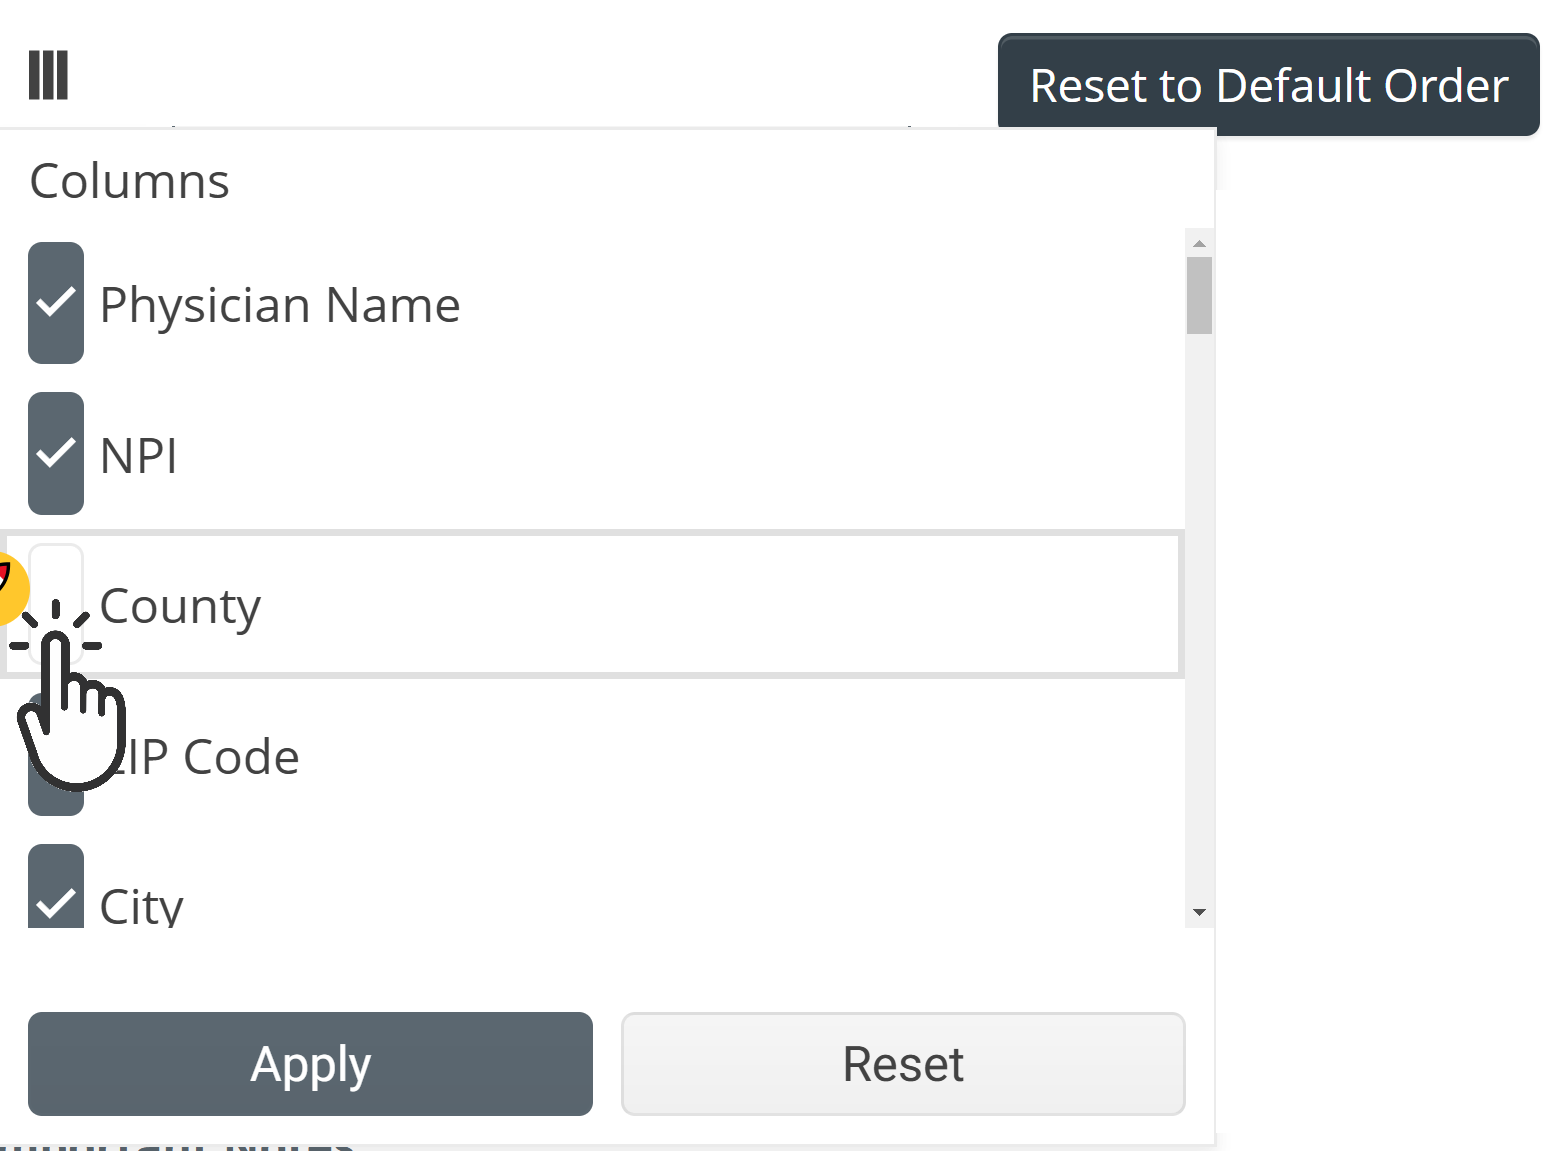
- Click on the checkbox at the left of any column name to toggle the checkbox on or off.
Columns with a check will be displayed in the table
- Click the "Apply" button to apply your changes to the table
- If you want to reset the column settings to their prior state, click the "reset" button.
The table will display only the columns you selected.
Moving Columns
Click and drag any column to a new location as shown in the following animation.
If you want to restore the columns in the table to the original order, click the "Reset to Default Order" button.
![]()
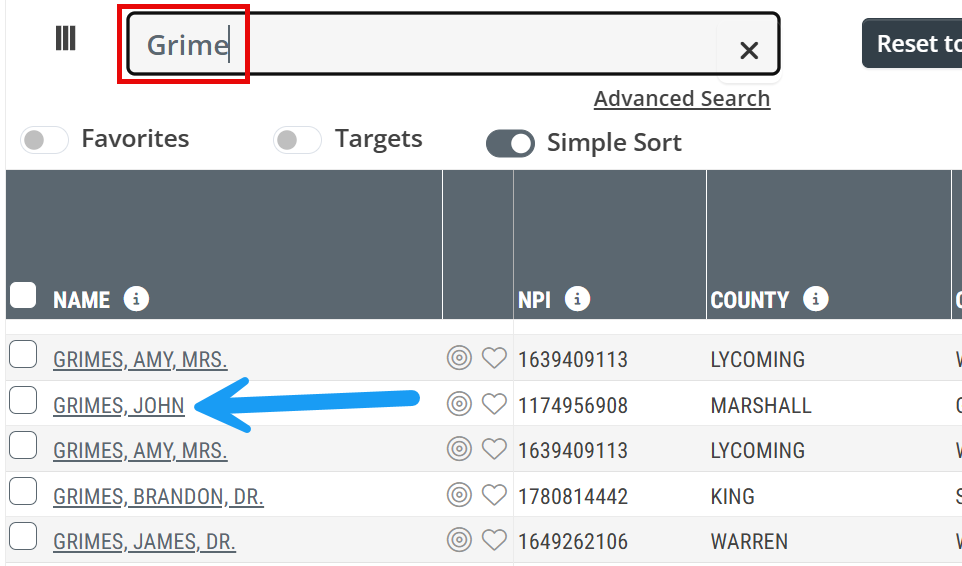
![]() Table Search - You can use the table search to find a specific entry in the table by name, NPI, or Alias. In the example below, we were looking for John Grimes in the Physicians table.
Table Search - You can use the table search to find a specific entry in the table by name, NPI, or Alias. In the example below, we were looking for John Grimes in the Physicians table.
![]() A couple details
A couple details
- Notice that we searched for "Grime" and that the partial entry generated the desired results.
- Every entry that matches the search parameters will appear in the table.
Advanced Search
|
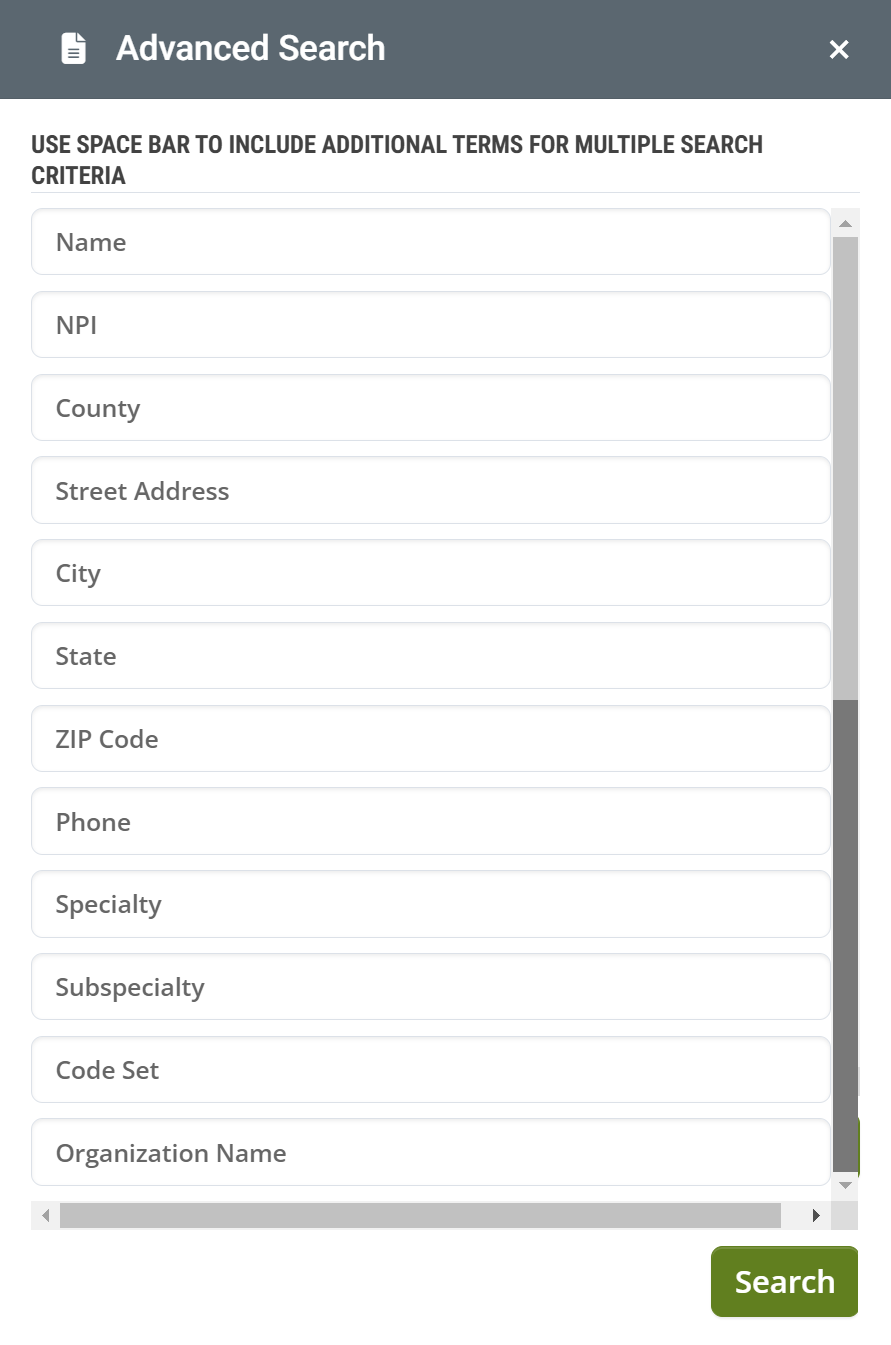
Beneath the table search field is the "Advanced Search" link.
Clicking this link will open the "Advanced Search" dialog box. (Shown at right.) Enter a specific search parameter in a single field or multiple fields to search the entries in the table in great detail. Click the "Search" button when you are done.
|
 |
![]() Group Actions - Using this feature, you will be able to select multiple entries from the table and perform specific actions on the entries you selected.
Group Actions - Using this feature, you will be able to select multiple entries from the table and perform specific actions on the entries you selected.
| Step one - Click the check box or boxes to the left of the names of the entities upon which you want to perform a group action. | 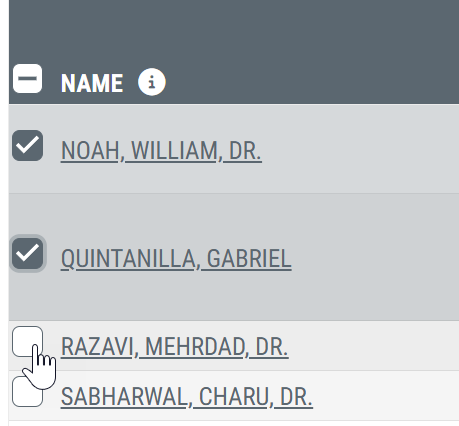 |
Step two - Six Options - click on one of the buttons.

-
1 - Favorite - This will make the selected entries your favorites. You can filter many tables in Trella products by your favorites by using the "Favorites" toggle at the top of the table.

-
2 - Target - This will make the selected entries your targets. You can filter many tables in Trella products by your targets by using the "Targets" toggle at the top of the table.

- When you click on the "Target" option, the following dialog box will open with the following options
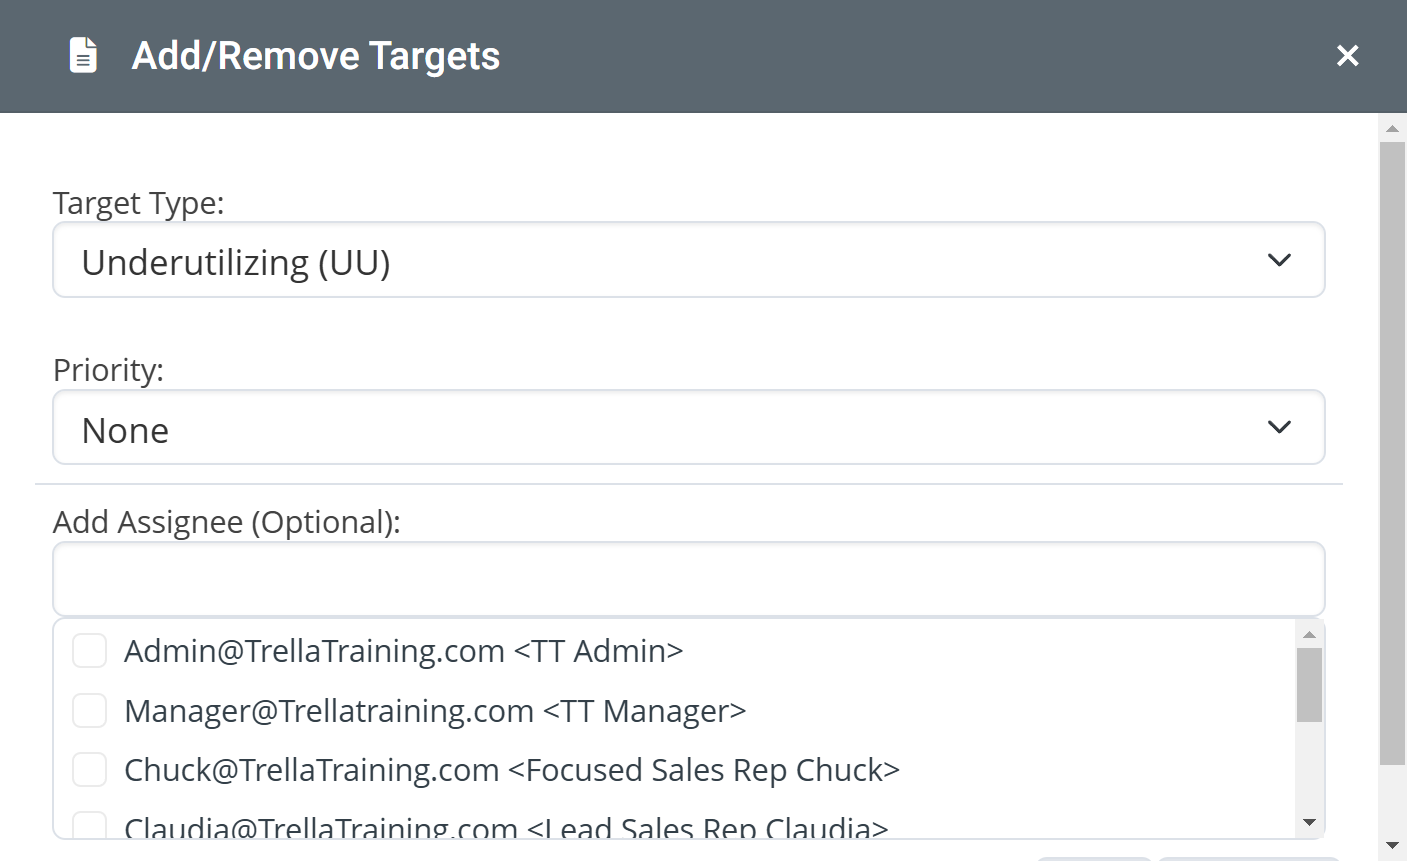
- Choose a target type from the options
- Choose a priority level

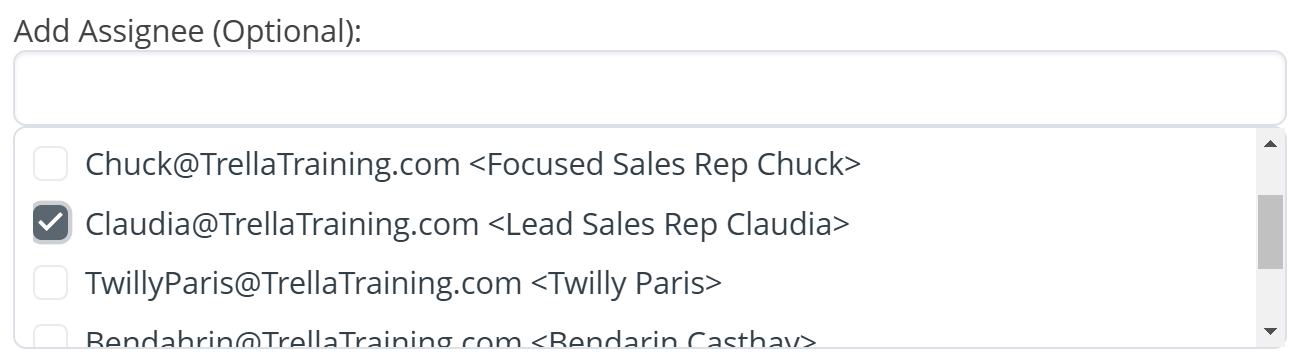
- <Optional> Choose a recipient to be assigned the targets
- 3 - Sales Spotlight - Clicking this option will open a dialog box where you can choose a user to receive a Sales Spotlight email for each entry selected. Click the "Send" button after you select the recipient.
![]() For more information, see The Sales Spotlight Email.
For more information, see The Sales Spotlight Email.
- 4 - Assign User - Clicking this button will open a dialog box where you can assign the selected entries to a user in your company.
- 5 - Unassign User - Clicking this button will open a dialog box where you can unassign the selected entries from a user in your company.
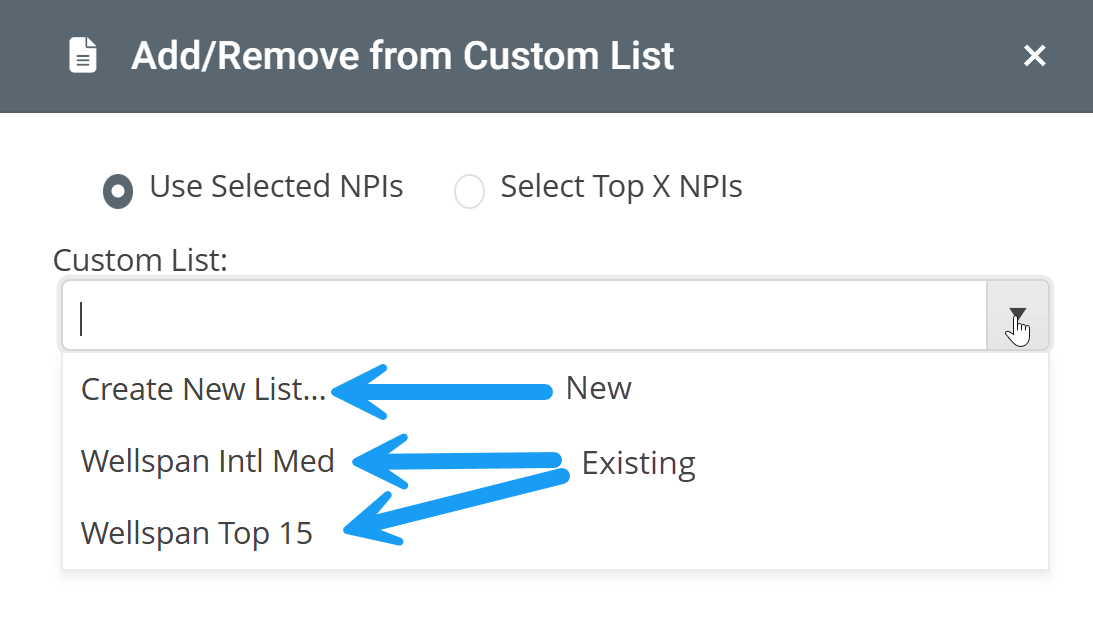
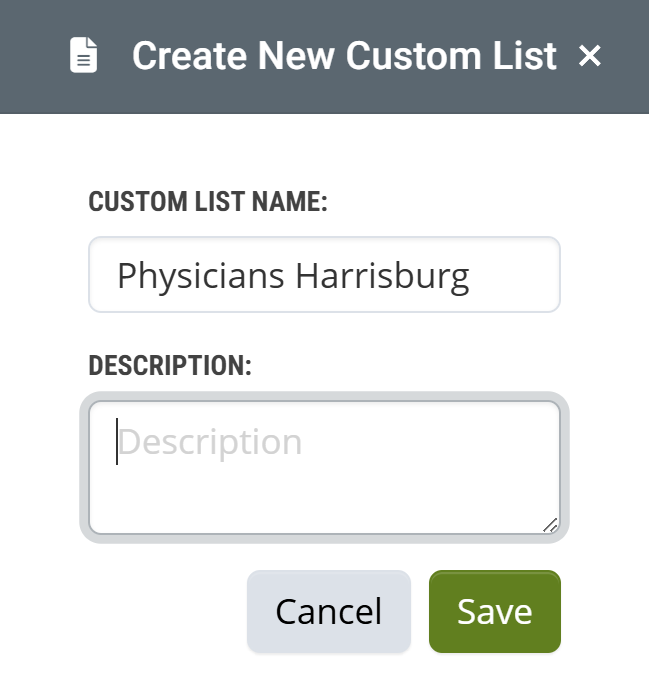
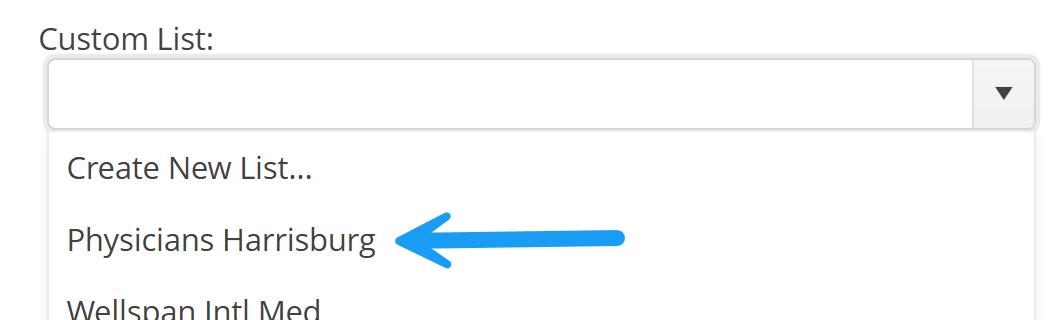
- 6 - Custom List - This button will open a dialog box that will allow you to create a custom list to which the selected entries will be added. You can also add the selected entries to an existing list, or remove the selected entries from an existing list.
|
 |
| |
|
Removing entries - if you want to remove the selected entries from a list that already exists, click on the existing list, then click on the "Remove" button.
| |
Use Selected vs Select Top X NPIs
![]()
At the top of the "Add/Remove from Custom List" dialog box, there are two options.
- Use selected NPIs will either add or remove the entries that you selected for this group action.
- Select Top X NPIs - If, however, you have filtered and sorted the table to display the top entities that match your desired criteria, you can add the top 10, 15, or 25 entries to a new or existing custom list.
![]() Excel Export - Once you have filtered the data, clicking the "Excel" button
Excel Export - Once you have filtered the data, clicking the "Excel" button ![]() will export the entries in the table as an Excel spreadsheet. This will allow you to slice and dice the data using the spreadsheet tools.
will export the entries in the table as an Excel spreadsheet. This will allow you to slice and dice the data using the spreadsheet tools.
![]() Sorting/Definition - Clicking on the text of a header name in any column will sort the table by the metrics in the chosen column. (See more below)
Sorting/Definition - Clicking on the text of a header name in any column will sort the table by the metrics in the chosen column. (See more below)
| Definition - Clicking on the "i" button will open a definition for the metric in the column. | 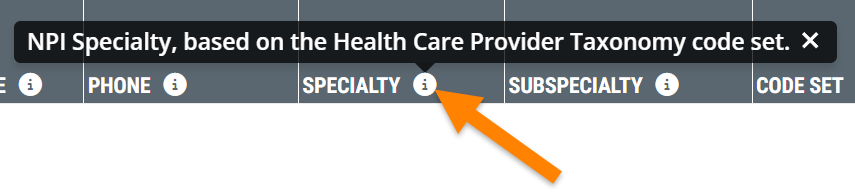 |
Sorting
![]() Value! - If you are looking for physicians a specific territory with the highest counts for a specific metric, the process is two steps simple!
Value! - If you are looking for physicians a specific territory with the highest counts for a specific metric, the process is two steps simple!
- Set up the Location filter for a specific territory
- Click on the column header for the desired metric!
The physicians with the highest counts are sorted to the top - browse, export, or create a custom list!
| An arrow will indicate whether the column is sorted ascending or descending | |
| Descending order - Highest at top | Ascending order - lowest at top |
 |
 |
| If a column is not sorted, the first click will sort the table on that column in descending order, a second click will sort ascending, and the third click will turn sorting off for that column. | |
![]() There is always a default column by which the table is sorted if no other sorting choices are made. You can generally tell by looking at the table which column is the default because that column will be sorted in descending order.
There is always a default column by which the table is sorted if no other sorting choices are made. You can generally tell by looking at the table which column is the default because that column will be sorted in descending order.
Simple Sort
At the top of the table is a toggle button that will allow you to turn simple sorting on or off
|
With Simple Sort off, you will be able to sort by multiple columns. For example, you could sort the table by Medicare FFS Claim Counts and then by Medicare FFS Patient Counts. You can combine multiple ascending and descending sorts by different columns |
With Simple Sort on, you will only be able to sort the table using a single column/metric. |
![]() You can remove the current sorting settings by clicking on the "Clear Sort" button.
You can remove the current sorting settings by clicking on the "Clear Sort" button. ![]()
![]() Preview - Clicking the magnifying glass icon to the left of any provider name will open a preview table of the top source or destination entities for the provider you selected.
Preview - Clicking the magnifying glass icon to the left of any provider name will open a preview table of the top source or destination entities for the provider you selected.
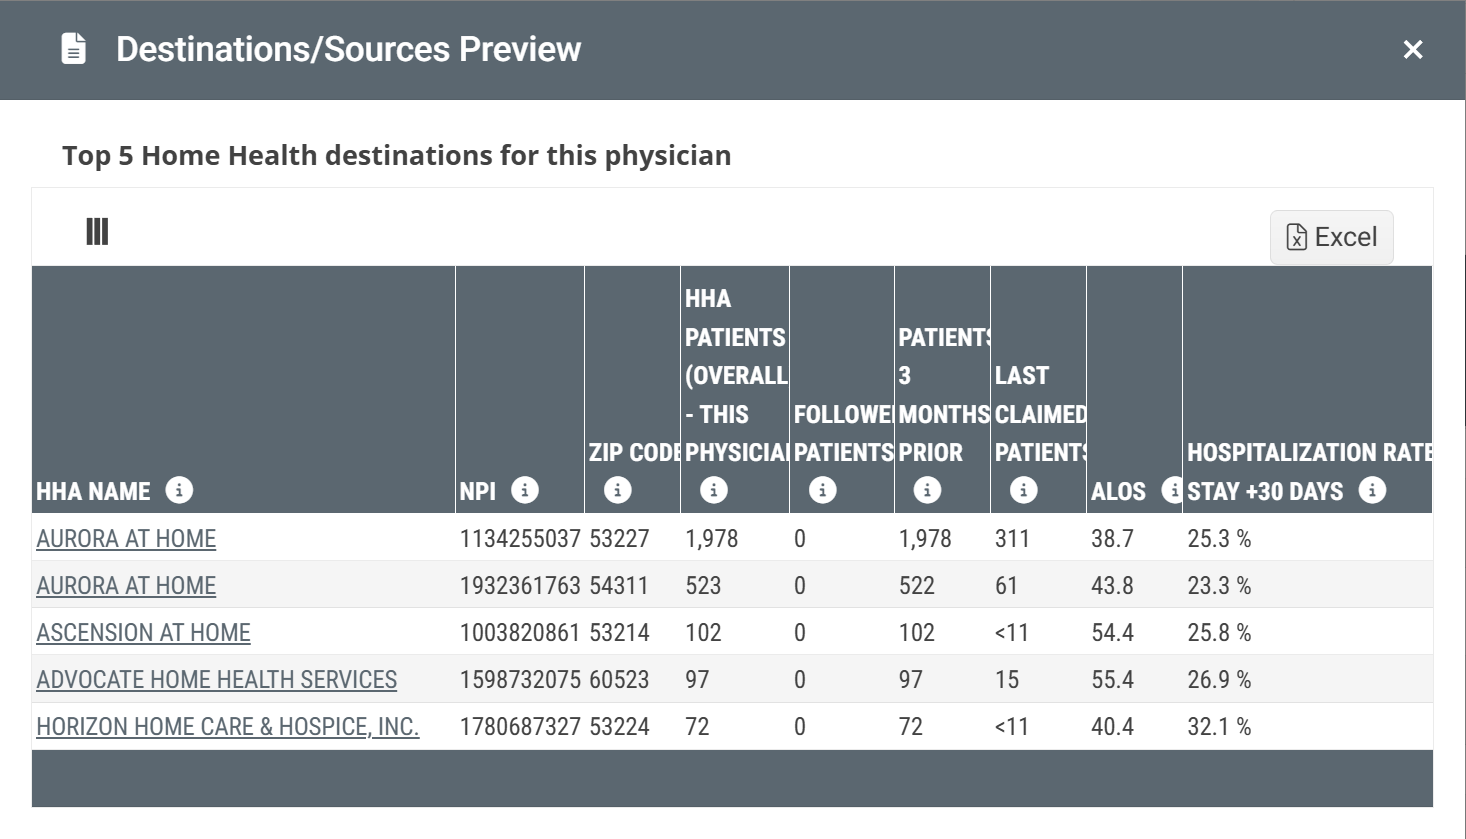
![]() The name of the table indicates the provider type and whether the table contains sources or destinations.
The name of the table indicates the provider type and whether the table contains sources or destinations.
![]() Link/Target/Favorite - Each row has a few shortcut tricks that you will find useful!
Link/Target/Favorite - Each row has a few shortcut tricks that you will find useful!
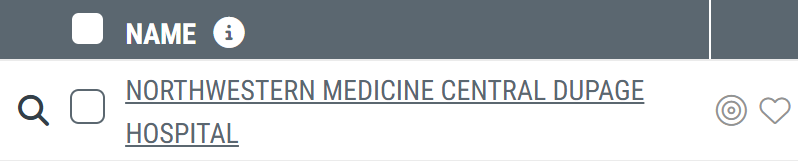
- Link - The name is a link that will open the Analyze page for the selected entry. If you are viewing the table under the Assisted Living/Long Term Care tab, the names are not links because those facilities do not have connected Analyze pages.
- Target - Clicking the target icon will immediately mark the entry as a target - a dialog box will open with additional options:
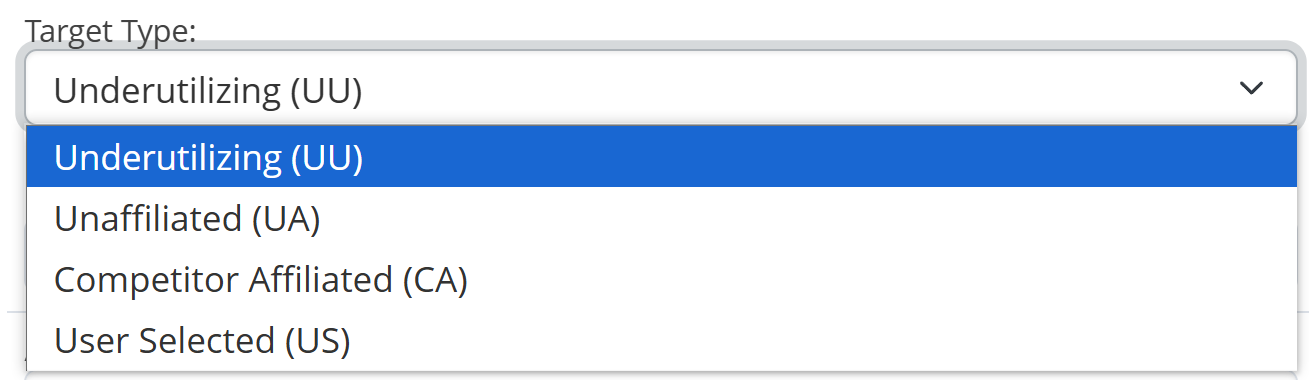
Target Type
Use the "Target Type" dropdown to select a target type from the list shown.
Priority
Use the "Priority" dropdown to select a level of priority from the list shown.
Add an assignee
Use the "Add Assignee" dropdown to assign the selected provider/referrer/supplier to a user you select from the list shown.
- Favorite - Click the heart to make the entry in the row one of your favorites.
![]() Main Table - This is where you will find the metrics you are looking for.
Main Table - This is where you will find the metrics you are looking for.
|
Each row is a link that will open additional information pertaining to what is listed in the header.
|
 |