Overview
The content of this article is focused on the Hospices Explore page filters in Marketscape Insights for Hospice. In this article we will provide suggested filter sets that are the most relevant for the chosen Explore page. You can think of these filter "recipes" as best practices for finding the most relevant data on the page. If you want to create your own recipes, the second part of the article provides useful details about each available filter on the page.
![]() For an overview of how to use filters, see Filters - Overview and Strategy.
For an overview of how to use filters, see Filters - Overview and Strategy.
Available Filters
The following image shows the filters on the Hospices Explore page in Marketscape Insights for Marketscape Insights for Hospice.

 In this article
Filter Recipes
As mentioned in the Overview and Strategy article, there are many, many possible combinations of filter settings, and what you choose depends on what results you want in the table. In this section, we are going to propose an objective along with filter settings that will give you those results in the Explore page table.
![]() If you are not using an already established default location, your first step for each recipe will always be to set up the location filter. For basic setup instructions, see The Location Filter.
If you are not using an already established default location, your first step for each recipe will always be to set up the location filter. For basic setup instructions, see The Location Filter.
Recipe 1 - Objective: Find Hospices in a specified region
- Confirm the location filter settings for your region of interest
- Click on the "Apply Filters" button
![]() This will allow you to compare your own hospice to all other hospices in the selected region.
This will allow you to compare your own hospice to all other hospices in the selected region.
Recipe 2 - Objective: Evaluate and Compare performance of "My Agencies"
- Location Filter - For this recipe, you may or may not want to use a limited region for the results. The filter we will use will show every hospice in your company. If you want to see all hospices in your company, don't use the location filter. If you want to limit the list to your hospices in a defined region, then you can set the location filter to a more limited region.
- Click the the "My Agency" toggle to the "on" position.
 This will limit the hospices in the table to your hospices.
![]() This allows you to compare patient counts and performance metrics for your hospices.
This allows you to compare patient counts and performance metrics for your hospices.
List of Filters

| Filter name/Details | Image |
| Location (See below) | The location filter is explained below. |
| Range Filters (See below) | Range filters described below. |
|
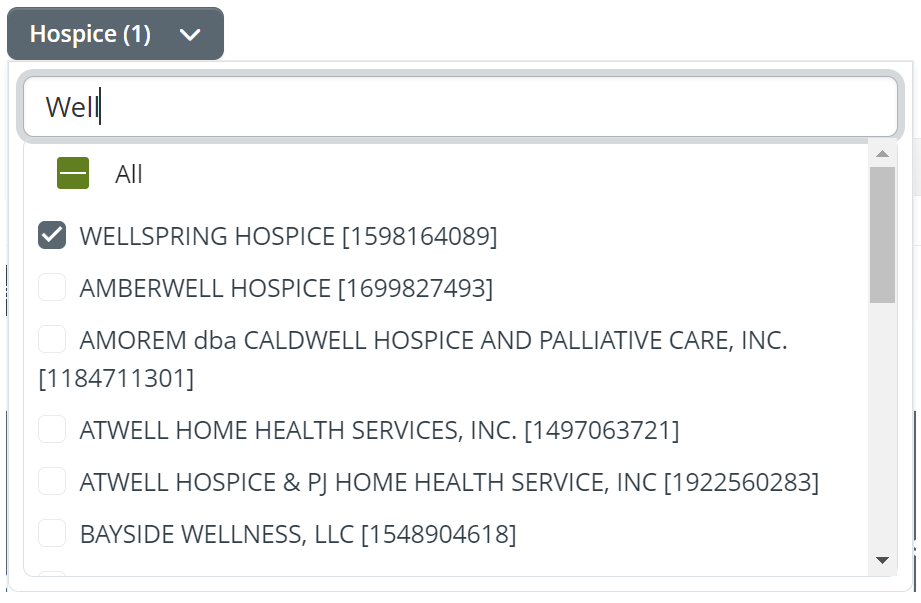
Hospice - Use this filter to select which hospices will be shown in the Explore table.
|
 |
|
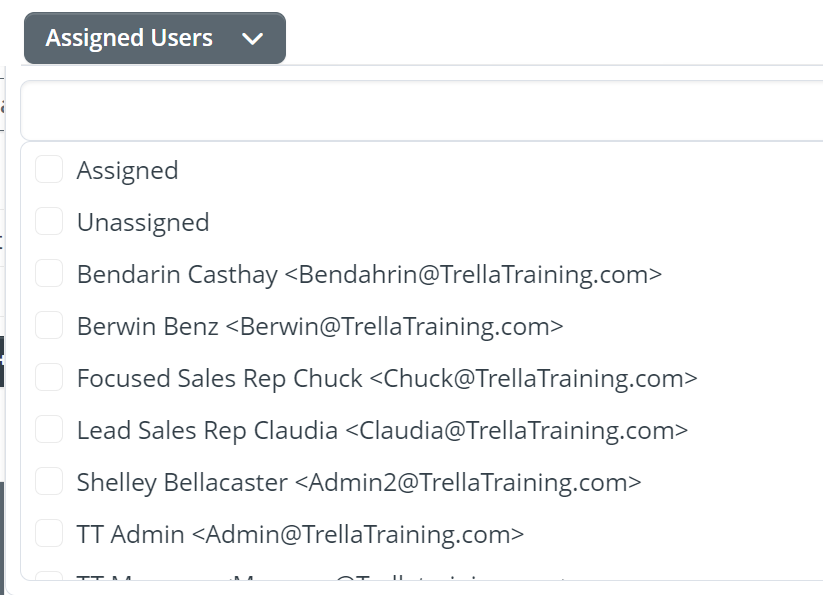
Assigned Users - Use this filter to display only hospices that are assigned to a user or users in your company.
|
 |
|
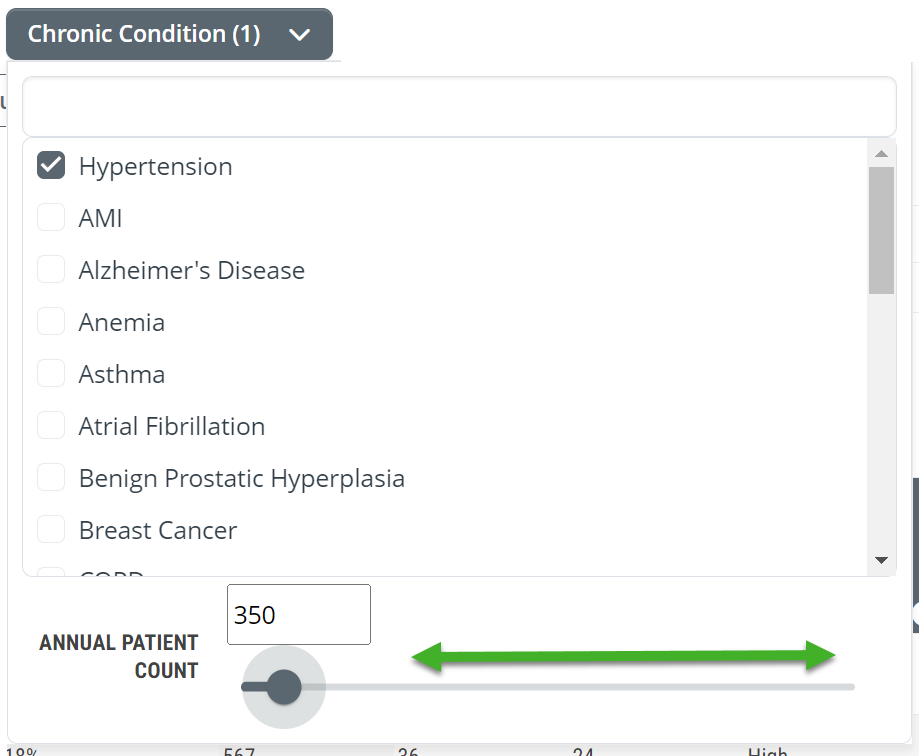
Chronic Condition - Find hospices that have treated a minimum number of patients for a chosen chronic condition. You can only choose one chronic condition at a time.
|
 |
|
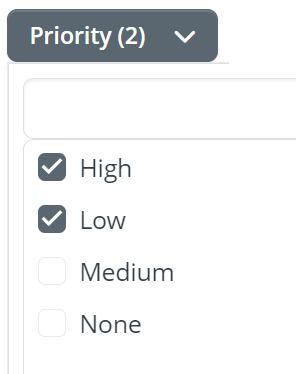
(Target) Priority - If some hospices have been tagged as targets and those targeted hospices have been assigned a priority level, you can use this filter to limit the entries in the table to hospices with the matching priority level.
|
 |
|
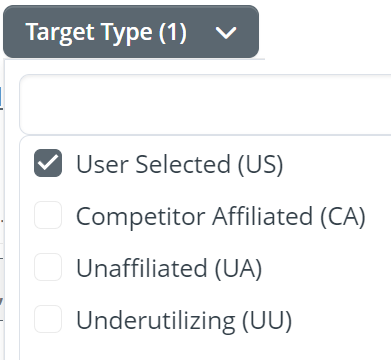
Target Type - If hospices have been tagged as targets and those targeted hospices have been assigned a target type, you can use this filter to limit the entries in the table to hospices with the matching target type.
|
 |
|
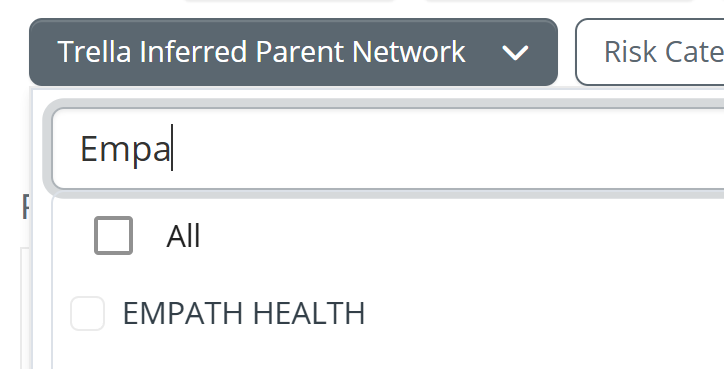
Trella Inferred Parent Network - The Trella Inferred Parent Network filter contains a list of all TIPN networks identified by Trella Health in your contracted state(s). Use the filter to view providers for a specific TIPN, you can type the name into the filter search field and matching names will appear in the list.
|
 |
|
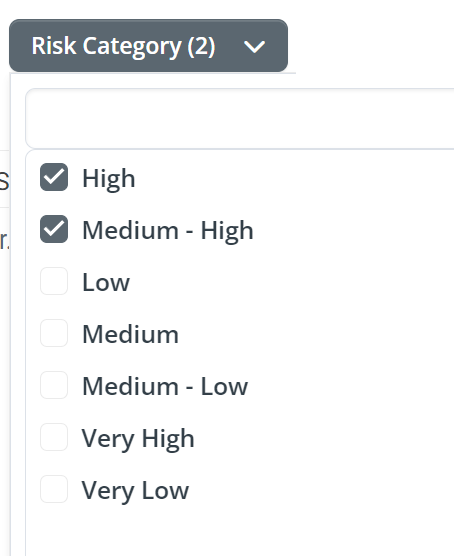
Risk Category - Use this filter to find hospices that are rated with a specific risk category rating.
|
 |
|
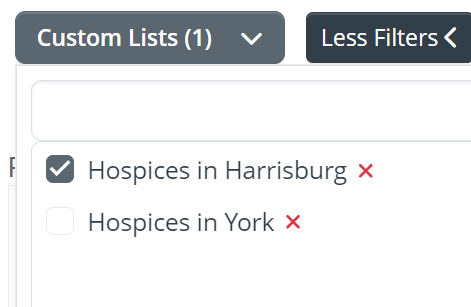
Custom Lists - If you have created custom lists, you can use this filter to display the hospices in a selected list in the Explore table.
|
 |
The Location Filter
The location filter allows you to select the region for which you want to display results in the table.
- You can select as many states as you want by checking the check box to the left the state's abbreviation. When you add a state, counties from that state are then available in the County column.
- Select as many counties as you want. As you add counties, the Cities column will populate with cities in those counties
- If you choose cities, the ZIP codes for those cities will be displayed.
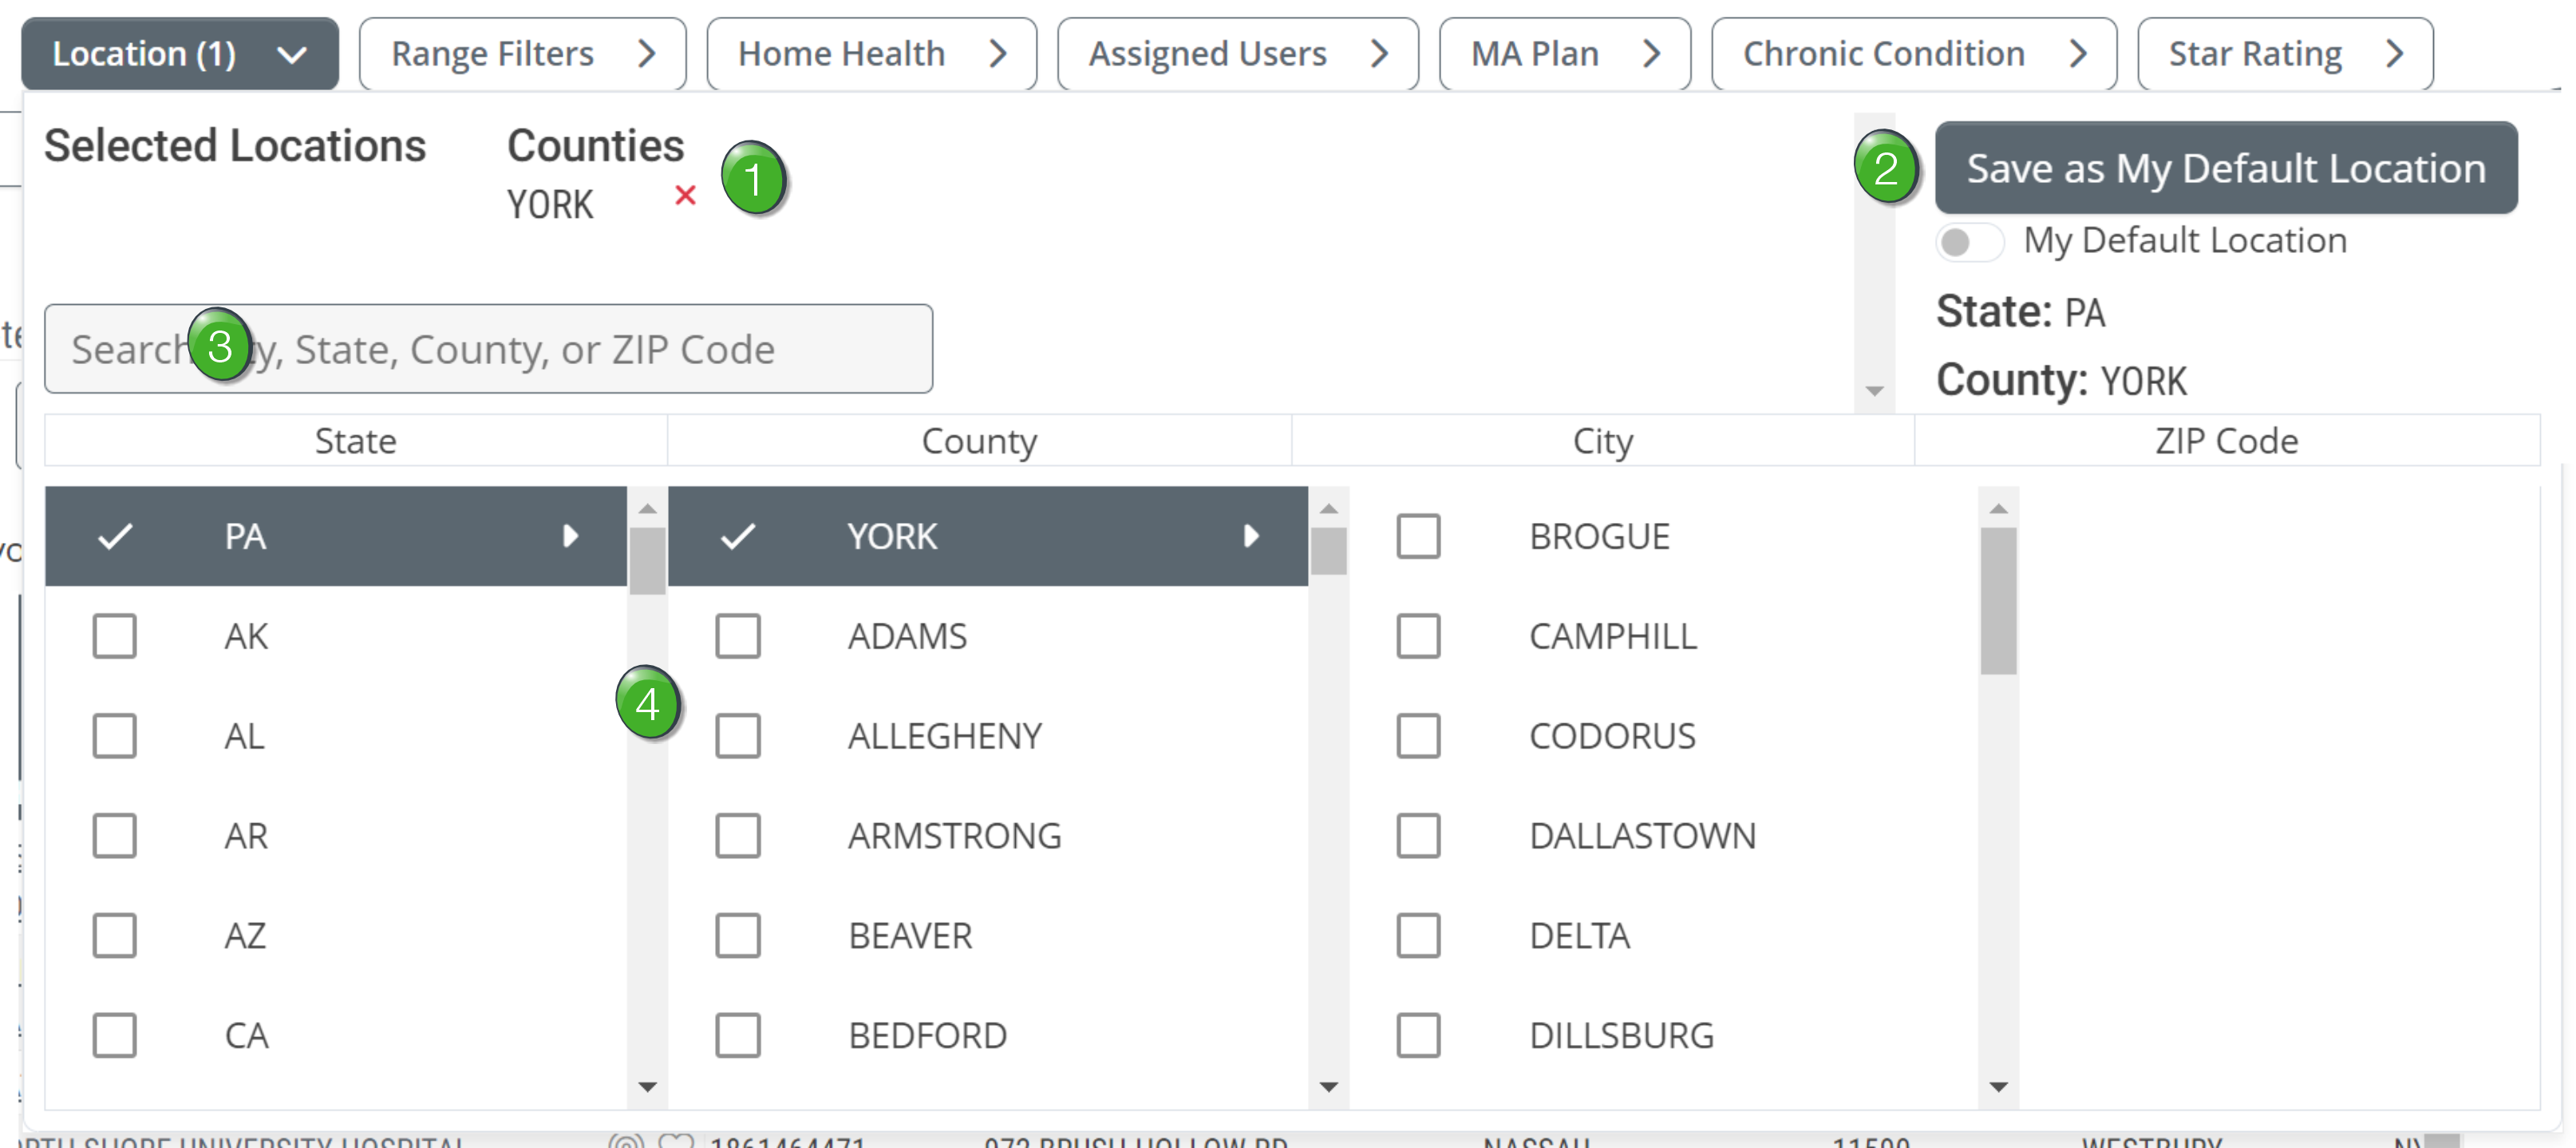
![]() Selected Locations - the list of locations that you select will be displayed at the top of the dialog box.
Selected Locations - the list of locations that you select will be displayed at the top of the dialog box.
![]() Default Location - Once you choose your region, click on the "Save as My Default Location" button to save your selection as your default location. This default location will be used automatically on all Explore pages unless you turn it off or change it.
Default Location - Once you choose your region, click on the "Save as My Default Location" button to save your selection as your default location. This default location will be used automatically on all Explore pages unless you turn it off or change it.
![]() Location Search - If you enter the name of a county or city, or the numbers in a ZIP code, matching locations will appear from which you can select the correct match. (See image.)
Location Search - If you enter the name of a county or city, or the numbers in a ZIP code, matching locations will appear from which you can select the correct match. (See image.)
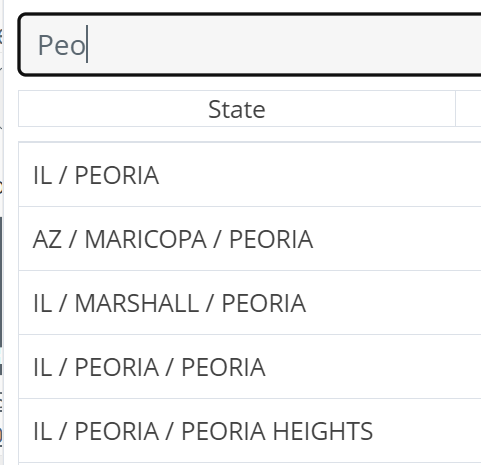
![]() As shown, you can enter a partial word in the search and the selection will be displayed.
As shown, you can enter a partial word in the search and the selection will be displayed.
![]() Locations Interface - Add the states, counties, cities, and ZIP codes by clicking on the checkbox to the left of each item.
Locations Interface - Add the states, counties, cities, and ZIP codes by clicking on the checkbox to the left of each item.
Range Filters
|
Range filters limit the entries in the Explore table based on the counts or percentages calculated for each hospice.
|
 |
